Are you tired of using plain old cups for ice cream or snacks? It’s time to step up your game and learn how to make cone paper!
Not only will this add a touch of creativity to your treats, but it also allows you to customize the size and shape of your cone.
Whether hosting a party or indulging in homemade desserts, making your own cone papers is an easy and fun way to elevate your food presentation.
In this article, we’ll guide you through the step-by-step process of creating perfect cone papers that will impress kids and adults alike.
Table of contents
Materials and Tools
Before we dive into the process of making a cone paper, let’s gather the materials and tools you’ll need:
Materials:
- Paper: You can use various paper types, such as construction paper, regular printer paper, or even decorative paper, for specific projects.
- Scissors: Sharp scissors for cutting the paper.
- Pencil: For marking and measuring.
- Ruler or Compass: To ensure accurate measurements.
You can start making your cone paper with these basic materials and tools.
Read Also: How to Lace Converse | Checkout these 7 Simple Steps)
Steps to Make a Cone Paper
Here are different ways on how to make a cone pattern:
a. How to Determine Cone Dimensions
The first step in making a cone paper is to determine the desired dimensions of your cone. This will depend on your specific needs and the application of the cone. Here’s how you can calculate the dimensions:
- Height (h): Decide how tall you want your cone to be and note this measurement. This will determine the distance from the tip of the cone to the base.
- Radius (r): The radius is the distance from the center of the base to the edge. Measure this length and make a note of it.
- Slant Height (l): The slant height is the distance from the tip of the cone to any point on the edge of the base. It can be calculated using the Pythagorean theorem:
l = √(r² + h²)Plug in the ‘r’ and ‘h’ values to find ‘l’.
b. Cutting the Paper
Now that you have your cone dimensions, it’s time to cut the paper to the right size. Follow these steps:
- Using your pencil, ruler, or compass, draw a circle with a radius ‘r’ on the paper. Ensure the center of the circle is clearly marked.
- Carefully cut out the circle along the marked line. This circle will become the base of your cone.
- Next, you need to create a sector from this circle. Cut a straight line from the circle’s edge to the center point to do this. This will give you a wedge-shaped piece.
- Roll the wedge into a cone shape, ensuring that the cut edge aligns with the opposite edge of the circle.
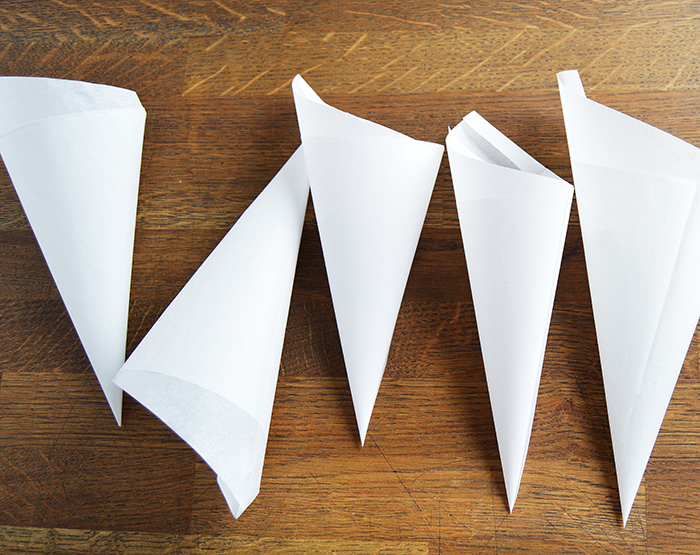
c. Rolling the Cone
Creating the cone shape might take a bit of practice. Here’s a step-by-step guide:
- Hold the wedge by the wider end, with the center point facing downward.
- Begin rolling the wedge into a cone shape, starting from the wide end and working towards the pointed tip.
- Ensure the edges align neatly and that the cone is rolled tightly but not so tight that it deforms the shape.
- Apply a small amount of adhesive, like glue or tape, to the overlapping edges to secure the cone in place. Hold it for a moment to allow the adhesive to set.
Read Also: How to Remove Torch/Flashlight From Lock Screen
d. Securing the Cone
To ensure your cone paper stays in its cone shape, follow these steps:
- Use a piece of tape or a small amount of glue to secure the seam where the two edges overlap.
- If you want a more decorative finish, you can use ribbon, string, or other decorative elements to wrap around the base of the cone and hide any visible seams or adhesive.
- Allow the adhesive to dry completely before using the cone paper in your desired application.
4. Decorating the Cone Paper
Cone papers can be left plain for simple applications or decorated to suit the occasion. Here are some ideas for decorating your cone paper:
- Painting or Coloring: Use markers, crayons, or paints to add patterns, images, or colors to the cone.
- Stickers: Apply stickers, decals, or adhesive decorations to give your cone a personalized touch.
- Ribbons and Bows: Attach ribbons or bows around the base of the cone for a more elegant look.
- Glitter: Apply glue and sprinkle glitter over the cone for a festive and sparkly effect.
- Origami or Papercraft: Create intricate designs using origami or papercraft techniques to make your cone paper stand out.
- Personalization: Write names, messages, or greetings on the cone to make it unique for each individual.
The possibilities for decorating your cone paper are limited only by your creativity and the occasion.
5. Applications of Cone Papers
Cone papers have a wide range of applications across various fields. Here are some of the most common uses:
- Party Hats: Cone papers are often used to create party hats for birthdays, holidays, and celebrations. They can be customized with colors, themes, and decorations to suit the party’s mood.
- Ice Cream Cones: In the culinary world, cone papers are used to wrap and serve ice cream cones. They provide a hygienic and convenient way to enjoy frozen treats.
- Educational Models: Cone papers are employed as a teaching tool in mathematics and geometry to illustrate concepts like volume, surface area, and the properties of cones.
- Engineering and Design: In engineering and design, cone papers are used for prototyping and creating physical models of cones, which are common shapes in various industries, such as manufacturing and architecture.
- Art and Crafts: Artists and craft enthusiasts use cone papers as a medium for creating sculptures, vases, and other decorative pieces.
- Educational Activities: Teachers often use cone papers for hands-on educational activities and projects, such as creating volcanoes for science experiments.
- Gift Packaging: Smaller cone papers can be used as unique and eye-catching gift packaging for small items or party favors.
- Home Decor: Cone papers can be used in home decor projects like creating paper flower arrangements or decorative centerpieces.
Read Also: How Many People Can I Unfollow on Instagram?
FAQs
While possible, it’s better to use sturdier paper, like construction paper for more durable cones.
Cone papers are versatile and can be used for party hats, treat cones, or as a base for paper flowers.
You can use glue or double-sided tape to secure the seam.
Yes, acrylic or watercolor paints work well for decorating your cones.
Conclusion
Crafting cone papers is a delightful way to express your creativity and add a personal touch to various projects. Whether making party favors or decorations or simply enjoying a crafty afternoon, mastering the art of creating cone papers is a valuable skill.
With the right paper, cutting, rolling, and a sprinkle of imagination, you can make beautiful cone papers that will impress everyone. So, go ahead, grab your favorite paper, and start crafting your cone paper masterpieces!