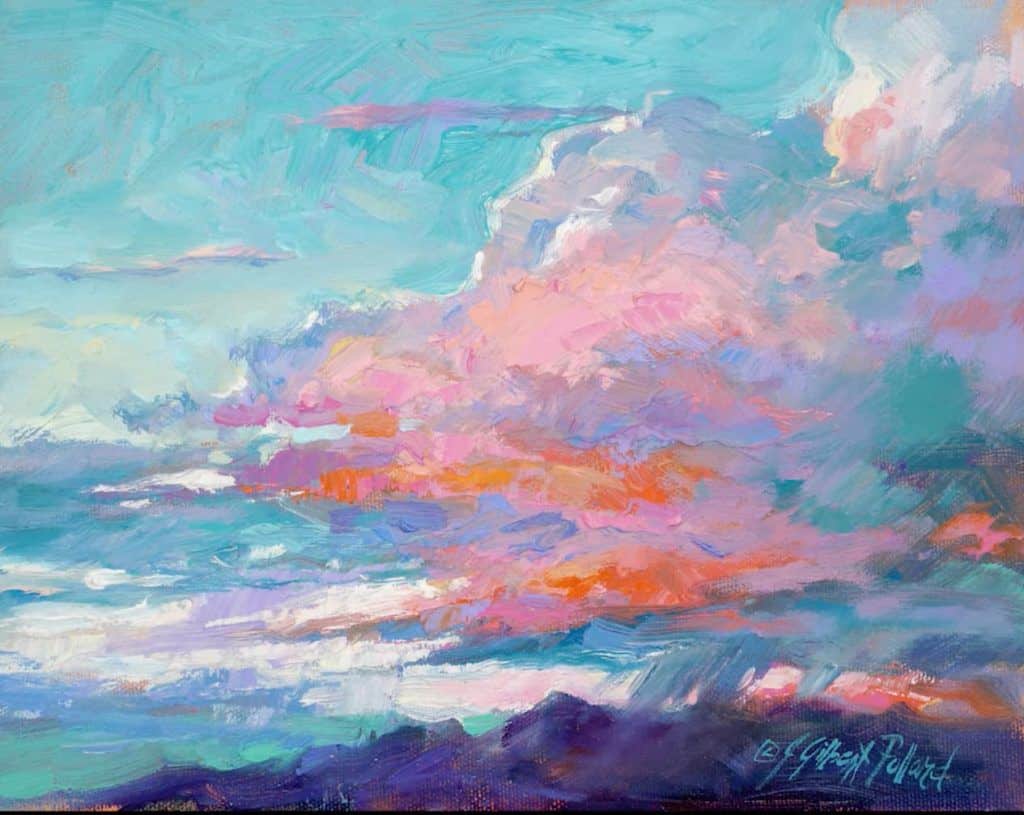
Gazing at a tranquil sky filled with fluffy clouds has a magical quality, and capturing that serenity on canvas is an art form that anyone can master.
If you’ve ever wondered how artists bring clouds to life in their sky paintings, you’re in for a treat.
In this guide, we’ll embark on a journey to demystify the art of painting clouds, turning your canvas into a serene masterpiece of the sky.
Table of contents
What Materials do I need to Paint Clouds?
To paint clouds, you don’t need an extensive array of materials. Here’s a simple list of basic items to get you started:
Paintbrushes:
Have a variety of brushes in different sizes, including round brushes for details and larger brushes for broader strokes.
Palette:
Use a palette to mix and blend your paint colors. A flat, reusable palette with wells works well.
Paints:
Acrylic or oil paints are suitable for cloud painting. Have a basic set of colors, including white, different shades of blue, and perhaps a touch of gray or other soft hues.
Canvas or Painting Surface:
Choose a canvas or painting surface to be your sky. Canvas boards, stretched canvases, or even specialized painting paper work.
Palette Knife (optional):
A palette knife can be useful for creating textured effects in your clouds. It’s optional but adds versatility to your technique.
Palette Paper or Disposable Palette:
If you prefer an easy cleanup, use palette paper or a disposable palette for mixing your paints.
Palette Cup or Jar of Water (for acrylics):
If you’re using acrylics, keep a cup or jar of water handy for rinsing your brushes.
Palette Cloth or Paper Towels:
Have a cloth or paper towels for cleaning your brushes and wiping off excess paint.
Remember, the beauty of cloud painting is in the simplicity and the freedom to experiment. Don’t hesitate to add or modify materials based on your preferences and the style you want to achieve.
You should read: What Do Guys Like to Be Called? (Top 25 Names)
How do I Choose the Right Colors for Clouds?
Choosing the right colors for clouds involves capturing the subtleties of light and atmosphere. Here’s a guide to help you pick the right hues for your cloud painting:
White isn’t Just White:
Clouds are rarely pure white. Add depth by incorporating various shades, such as light blues, grays, and even subtle pinks or oranges during sunrise or sunset.
Observe the Sky:
Spend time observing the sky during different times of the day and under various weather conditions. Note how the colors change and influence the appearance of the clouds.
Consider the Light Source:
Determine the direction of light in your painting. If the light is coming from the setting sun, the clouds might have warmer tones. A midday scene may have cooler tones.
Mix Colors Gradually:
When creating clouds, start with a base color (often a light blue or gray) and gradually add other colors. Blend them seamlessly to avoid sharp contrasts.
Experiment with Warm and Cool Grays:
Use warm grays (with hints of red or yellow) and cool grays (with hints of blue) to create dimension in your clouds. This adds realism and captures the interplay of light.
Add Subtle Hues for Atmosphere:
Introduce subtle hints of color to represent the atmosphere around the clouds. This can enhance the overall mood of your painting.
Don’t Overlook Shadows:
Shadows on clouds are often tinted with blues and purples. Incorporate these shadow tones to give your clouds a three-dimensional appearance.
Use Earth Tones Sparingly:
While clouds are mostly made up of whites and grays, you can use very small amounts of earth tones like sienna or ochre to add warmth in certain areas.
Check out this related content: What Does GMS Mean on Snapchat?
How to Paint Clouds?
Step 1: Prepare Your Canvas:
Choose a canvas or painting surface and prepare it with a base color that represents the sky. This could be a light blue or a blend of blues for depth.
Step 2: Determine Light Source:
Identify the direction of light in your painting. This will influence the colors and shadows on your clouds.
Step 3: Mix Base Cloud Color:
Mix a base color for your clouds. Use white with a touch of light blue and gray. Adjust the ratio based on the time of day and the atmosphere you want to portray.
Step 4: Apply Base Color:
Using a larger brush, apply the base color in broad strokes to outline the general shapes of your clouds. Allow some of the sky color to show through for a natural effect.
Step 5: Add Highlights:
Mix a lighter version of your base color by adding more white. With a smaller brush, add highlights to the upper parts of the clouds where the light hits. Use gentle, feathery strokes.
Step 6: Create Shadows:
Mix a slightly darker version of your base color for shadows. Apply this color to the lower parts of the clouds and any areas that would be in shadow. Blend the shadows softly.
Step 7: Introduce Texture (Optional):
For a more textured look, use a palette knife to add small, random strokes to simulate the fluffy texture of clouds.
Step 8: Blend and Soften:
Use a clean, dry brush to blend and soften the edges of your clouds. This creates a seamless transition between the sky and the clouds.
Step 9: Add Subtle Colors (Optional):
If you want to enhance the atmosphere, add subtle hues like pinks, oranges, or purples in areas where the light interacts with the clouds.
Step 10: Final Touches:
Stand back and assess your painting. Make any final adjustments, add details, or refine any areas that need attention.
Tips:
- Observe Real Clouds: Spend time observing real clouds to understand their shapes, colors, and how light interacts with them.
- Practice Blending: Achieving a soft, natural look involves practicing the art of blending. Experiment with different brushes and blending techniques.
- Experiment with Shadows: Play with the intensity of shadows to create depth and realism in your clouds.
Now, armed with these steps, let your imagination soar as you create your own breathtaking cloudscapes on canvas!
Also check out this content: 26 Legitimate Ways to Get a Costco Student Membership for Free
Conclusion
Whether you’re a seasoned artist or just starting, the journey of mastering cloud art is both therapeutic and rewarding.
So, dip your brush in the hues of the sky, and let the clouds dance across your artwork, bringing a piece of serenity to your artistic endeavors. Happy painting!
Frequently Asked Questions
Absolutely! Painting clouds is a skill that can be learned by artists of all levels. With some guidance and practice, you’ll soon find yourself creating beautiful cloudscapes.
You only need a few basic materials: paintbrushes, a palette, acrylic or oil paints, and a canvas. A sky-blue backdrop is your canvas, and the clouds are your playground.
Yes, techniques like stippling, blending, and layering can bring realism to your clouds. Experimenting with these techniques allows you to find your unique style.
Clouds are not just white; they take on various shades. Incorporate light blues, grays, and even subtle pinks or oranges to capture the nuances of light and shadow.
Absolutely! Cloud painting isn’t limited to canvases. You can bring the sky indoors by painting clouds on walls, furniture, or even decorative objects, adding a touch of tranquility to your surroundings.
References
- kazimirmalevich.org– how to paint clouds
- artistsnetwork.com– cloud and skies paint techniques
- pinterest.com– how to paint clouds
Recommendations
- 26 Legitimate Ways to Get a Costco Student Membership for Free
- What Age Do You Graduate High School?
- Which Group is a Primary Supporter of Hunter Education?
- How Tall is Trippie Redd? Everything About the Rapper
- How Tall is Jack Skellington? All the Facts and Details
- How Big is 5 Inches? 6 Items with Accurate Measurement