When it comes to dryer vent cleaning, the seemingly simple act of keeping your dryer’s exhaust system clear transforms into a crucial maintenance task. In this content, we’ll go through the intricacies of how dryer vent cleaning works, delving into the importance of this process for both appliance efficiency and, more importantly, safety.
Table of contents
Is Cleaning My Dryer Vent Worth It?
Cleaning your dryer vent is unequivocally worth it. A clean dryer vent not only enhances the efficiency of your appliance, reducing drying times and energy consumption, but it also plays a crucial role in preventing potential fire hazards. Lint buildup in vents can lead to overheating and, in some cases, ignition. Regular maintenance not only ensures a safer environment but also extends the lifespan of your dryer. So, investing the time and effort in dryer vent cleaning is a small but significant step toward both safety and performance.
How Does Dryer Vent Work?
A dryer vent is a crucial component in the laundry process, responsible for expelling hot, moist air and lint from your dryer to the outside of your home. Understanding how a dryer vent works involves tracing the journey of air and particles from the moment your clothes start drying to the point they are released into the atmosphere.
Drying Process:
When you start your dryer, it begins the drying cycle by drawing in air from the
surroundings. This air is heated by the dryer’s heating element or gas burner, and it absorbs moisture from the wet clothes, turning it into steam.
Moisture Extraction:
The now moisture-laden air needs to be expelled from the dryer to continue the drying
process effectively. The moist air travels through the dryer vent system, carrying with it tiny lint particles that have detached from your clothes during the drying cycle.
Ventilation Pathway:
The dryer vent system typically consists of a flexible or rigid duct connected to the back of
the dryer. This duct carries the warm, moist air outside. Along the way, the lint particles are also carried through the vent.
Vent Hood:
The dryer vent terminates outside the home, often through a vent hood or cap. This
exterior termination point serves multiple purposes. It prevents pests from entering the vent, protects against weather elements, and facilitates the expulsion of warm, moist air into the open air.
Gravity and Airflow:
The movement of air through the dryer vent is primarily driven by the dryer’s internal
blower fan. Additionally, natural factors like gravity play a role in guiding the air downward and out of the vent.
Lint Filter:
Within the dryer, there is a lint filter designed to catch a significant portion of the lint
generated during the drying process. However, not all lint is captured, and some inevitably makes its way into the vent system.
Accumulation of Lint:
Over time, lint can accumulate in the dryer vent, potentially causing blockages. This
accumulation not only hampers the efficiency of the dryer by restricting airflow but also poses a significant fire hazard.
Understanding how a dryer vent works underscores the importance of regular maintenance. Cleaning the vent prevents blockages, ensures optimal performance, and mitigates the risk of fire associated with lint buildup.
How Often Should I Clean My Dryer Vent?
It’s generally recommended to clean your dryer vent at least once a year. However, the frequency may need adjustment based on several factors:
Usage Frequency:
If you use your dryer heavily, such as doing multiple loads of laundry each day, you might
need to clean the vent more often. Increased usage leads to a quicker buildup of lint.
Vent Length and Complexity:
Longer vents with more twists and turns can accumulate lint faster. If your dryer vent has
an intricate pathway through the walls, it may be prudent to clean it more frequently.
Lint Screen Cleaning:
Regularly clean the lint screen after each load. This helps reduce the amount of lint that
makes its way into the vent. A clean lint screen promotes efficient airflow.
Type of Drying Materials:
Certain materials, like towels and blankets, produce more lint. If you frequently dry
lint-producing items, consider more frequent vent cleaning.
Age and Type of Dryer:
Older dryers or models with less efficient lint filters may require more frequent vent
cleaning. High-efficiency dryers with advanced lint filtration systems may need less frequent attention.
Visual Inspection:
Keep an eye on the vent’s exterior opening. If you notice reduced airflow, it’s a sign that
the vent may need cleaning. Also, check for any visible lint around the dryer area.
Regular maintenance not only ensures the safety of your home by reducing the risk of dryer-related fires but also enhances the efficiency of your dryer.
Tools For Cleaning Dryer Vent
Cleaning your dryer vent effectively requires the right tools to ensure a thorough job. Here are some essential tools for cleaning a dryer vent:
- Vent Brush: A vent brush with long, flexible bristles is designed to navigate through the twists and turn of the vent, dislodging and removing lint.
- Lint Trap Brush: This smaller brush is handy for cleaning the lint trap area within the dryer itself. It helps reach corners and crevices that might be challenging with larger tools.
- Vacuum Cleaner with Nozzle Attachment: A vacuum is crucial for sucking up dislodged lint. Use a nozzle attachment to reach into the vent and collect loosened debris. Make sure the vacuum has sufficient suction power.
- Dryer Lint Removal Kit: Specialized kits often include a combination of brushes and vacuum attachments designed specifically for dryer vent cleaning. These kits can simplify the process.
- Lint Trap Cleaning Tool: A tool with an extended handle can help reach down into the lint trap housing to remove accumulated lint. It’s particularly useful for preventing lint buildup within the dryer.
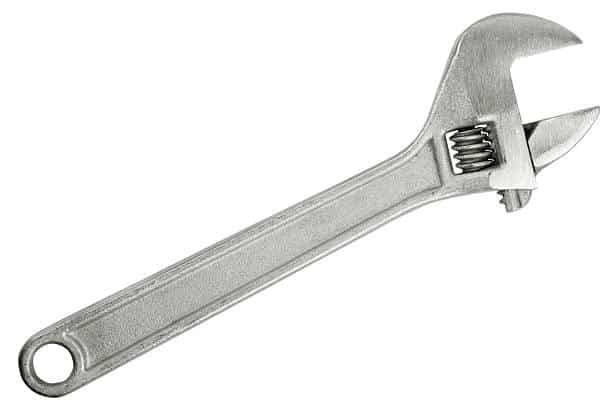
- Screwdriver: Depending on your dryer’s design, you may need a screwdriver to detach the vent from the back of the dryer for better access. Follow your dryer’s manual for specific instructions.
- Duct Tape or Zip Ties: After cleaning, secure the vent back in place using duct tape or zip ties if it’s a flexible duct. Ensure a tight connection to prevent leaks.
- Ladder: If your dryer vent terminates on the roof or a high exterior wall, a ladder will be necessary to access and clean the vent hood.
- Safety Gear: Depending on the location of your dryer vent, safety gear such as gloves and safety glasses may be advisable. This is especially relevant if you need to climb a ladder or if the vent is in a hard-to-reach area.
How To Clean Dryer Vent?
Cleaning your dryer vent is a crucial maintenance task that helps ensure the safety and efficiency of your dryer. Here’s a step-by-step guide on how to clean your dryer vent:
Step 1: Gather Necessary Tools:
Collect the tools needed for the job, including a vent brush, vacuum cleaner with nozzle attachment, lint trap brush, screwdriver, duct tape or zip ties, and a ladder if the vent terminates at an elevated point.
Step 2: Safety First:
Before you begin, ensure the dryer is turned off and unplugged. Additionally, wear safety gear such as gloves and safety glasses.
Step 3: Disconnect the Dryer:
Use a screwdriver to disconnect the vent from the back of the dryer. This allows better
access to the vent and makes cleaning more effective.
Step 4: Clean the Lint Trap:
Remove the lint trap and use a lint trap brush to clean any accumulated lint. This helps
improve the dryer’s efficiency.
Step 5: Use the Vent Brush:
Insert the vent brush into the vent duct, maneuvering it through the twists and turns. Push
and pull the brush to dislodge and loosen lint. Repeat this process several times.
Step 6: Vacuum the Vent:
Attach the nozzle attachment to your vacuum cleaner and use it to suction out the
loosened lint. Continue until you no longer see lint coming out.
Step 7: Clean the Exterior Vent Hood:
If your vent terminates on an exterior wall or roof, inspect and clean the vent hood.
Remove any visible lint and ensure the hood’s flapper or louvers move freely.
Step 8: . Reconnect the Dryer Vent:
Once the vent is clean, reconnect it to the back of the dryer using duct tape or zip ties to
ensure a secure connection.
Step 9: Perform a Test Run:
Turn on your dryer and let it run for a few minutes. Monitor for proper airflow and check for
any unusual noises. This step ensures that you’ve reconnected the vent correctly.
Step 10: Regular Maintenance:
Establish a routine for dryer vent cleaning, ideally once a year or more frequently if you
notice reduced drying efficiency. Regular maintenance helps prevent lint buildup and reduces the risk of fire hazards.
Frequently Asked Questions
Cleaning your dryer vent is crucial for several reasons. It enhances the efficiency of your dryer, reduces drying times, and lowers energy consumption. More importantly, it mitigates the risk of fire hazards associated with lint buildup in the vent.
It’s generally recommended to clean your dryer vent at least once a year. However, factors such as heavy usage, vent length, and the type of materials dried may necessitate more frequent cleaning.
While some homeowners opt for DIY cleaning using readily available tools, hiring a professional service is advisable for a thorough job. Professionals have specialized equipment and experience to ensure effective vent cleaning.
Reduced drying efficiency, longer drying times, a hot dryer exterior, or a burning smell during operation are indicators that your dryer vent may be clogged and in need of cleaning.
Yes, neglected dryer vents pose significant safety risks. Lint accumulation can lead to overheating, causing a potential fire hazard. Regular cleaning reduces this risk and enhances the overall safety of your home.
Essential tools include a vent brush, vacuum cleaner with nozzle attachment, lint trap brush, screwdriver, duct tape or zip ties, and possibly a ladder if your vent terminates at an elevated point.
A clogged vent restricts airflow, causing the dryer to work harder and consume more energy. Cleaning the vent improves efficiency, reduces energy consumption, and extends the life of your dryer.
Yes, lint is highly flammable, and a clogged dryer vent increases the risk of lint ignition, potentially leading to a fire. Regular vent cleaning is crucial for preventing this hazard.
The steps include gathering tools, disconnecting the dryer, cleaning the lint trap, using a vent brush to clean the duct, vacuuming the vent, cleaning the exterior vent hood, reconnecting the dryer vent, and performing a test run to ensure proper airflow.
Regularly clean the lint trap, schedule annual vent cleanings, avoid overloading the dryer, and ensure proper vent installation with minimal twists and turns. Monitoring drying times and addressing any issues promptly contributes to efficient vent maintenance.
Conclusions
By navigating through the unseen pathways of lint removal and ventilation maintenance, you not only safeguard your home from potential fire hazards but also elevate the performance and longevity of your trusty dryer.
References
- architecturaldigest.com – Dryer Vent Cleaning Is Easier Than You Think: 7 Simple Steps to Removing Lint Buildup
- airductcleaningarizona.com – How Do Professionals Clean Dryer Vents
- planetduct.com – DRYER VENT CLEANING PROCESS
Recommendations
- Big is 10 Acres of Land? (Visual Examples for Comparison)
- How Many Months is 60 Days? (Explaining the Calculation Process)
- How Big is 5 Inches? 6 Items with Accurate Measurement
- How Long Are Menards Rebates Good For?
- How Tall Is All Might? Everything To Know About Hero Academia
- How Tall is Kevin Gates? Everything about the Rapper
- How Long Are HS Football Games? (Explained)
- How Tall is Trippie Redd? Everything About the Rapper