Are you a handy person or a novice looking to add a personal touch to your lighting fixtures? This guide will walk you through the process of rewiring a lamp in less than 10 easy steps. Yes, 10 steps! We’ll cover everything from your kit to a step-by-step guide to rewiring.
Table of contents
- Lamp Rewiring Kits
- Safety Precautions When Rewiring A Lamp
- Disconnect Power:
- Use the Right Tools:
- Work in a Well-Lit Area:
- Check for Damage:
- Safety Glasses:
- Gloves:
- Work on a Stable Surface:
- Understand Polarity:
- Cap Unused Wires:
- Inspect Replacement Parts:
- Follow Manufacturer Instructions:
- Avoid Water Contact:
- Check Wattage Compatibility:
- Double-Check Connections:
- Test Before Final Assembly:
- How To Rewire A Lamp
- Common Issues When Rewiring A Lamp
- Frequently Asked Questions
- Conclusions
- References
- Recommendations
Lamp Rewiring Kits

Lamp rewiring kits are indispensable tools for anyone looking to breathe new life into their old or worn-out lamps. These kits typically come with a comprehensive set of components and instructions, simplifying the rewiring process and making it accessible even for those with limited electrical expertise.
Cord Set:
– The heart of any lamp rewiring kit is the cord set. These sets usually include a length of electrical cord with two ends – one for connecting to the lamp socket and the other for plugging into an outlet.
Socket:
– A new lamp socket is often included in these kits. The socket is where the light bulb is screwed in and plays a crucial role in providing a secure and functional connection.
Plug:
– Some kits come with a new plug, which is attached to one end of the cord set. This plug ensures a safe and reliable connection to the power source.
Other Electrical Components:
– Depending on the kit, additional components like wire nuts, washers, and screws may be included to facilitate the rewiring process.
Safety Precautions When Rewiring A Lamp

Ensuring safety is paramount when rewiring a lamp to protect yourself and prevent potential hazards. Here are essential safety precautions to follow:
Disconnect Power:
– Before beginning any work, unplug the lamp from the electrical outlet. If the lamp is hardwired, turn off the power at the circuit breaker.
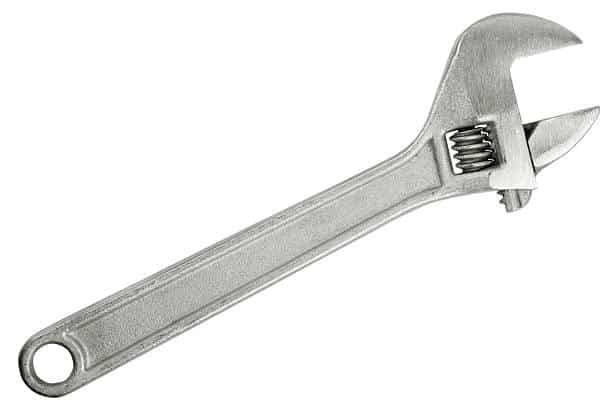
Use the Right Tools:
– Use tools specifically designed for electrical work. Ensure they are in good condition, with no frayed wires or damaged insulation.
Work in a Well-Lit Area:
– Adequate lighting in your workspace reduces the risk of accidents and helps you see what you’re doing more clearly.
Check for Damage:
– Inspect the lamp’s existing wiring for any signs of damage, such as frayed cords or exposed wires. If you find any issues, address them before proceeding.
Safety Glasses:
– Wear safety glasses to protect your eyes from any debris that might be dislodged during the rewiring process.
Gloves:
– Rubber or insulated gloves can provide an extra layer of protection against electric shock.
Work on a Stable Surface:
– Place the lamp on a stable and non-conductive surface. Avoid working on metal surfaces that could conduct electricity.
Understand Polarity:
– Be aware of the polarity of the wires. The hot wire is usually black or red, and the neutral wire is typically white. The grounding wire is green or bare. Ensure proper connections during rewiring.
Cap Unused Wires:
– If you have extra wires that are not in use, cap them with wire nuts to prevent accidental contact.
Inspect Replacement Parts:
– Before installing any replacement parts from a rewiring kit, inspect them to ensure they are free of defects or damage.
Follow Manufacturer Instructions:
– Adhere strictly to the instructions provided by the lamp rewiring kit or any replacement parts. Each lamp may have unique requirements.
Avoid Water Contact:
– Keep all electrical components away from water. Do not handle electrical parts with wet hands.
Check Wattage Compatibility:
– Ensure that the wattage of the light bulb is within the recommended range for the lamp. Using bulbs with the wrong wattage can pose a fire hazard.
Double-Check Connections:
– Before plugging in the lamp, double-check all connections. Ensure wires are securely fastened, and there are no loose components.
Test Before Final Assembly:
– Test the lamp after connecting the wires but before final assembly. This allows you to identify and address any issues without having to disassemble the entire lamp.
By following these safety precautions, you can significantly reduce the risk of accidents and create a safer environment when rewiring a lamp. If you ever feel uncertain or uncomfortable with any step, it’s advisable to seek assistance from a qualified professional.
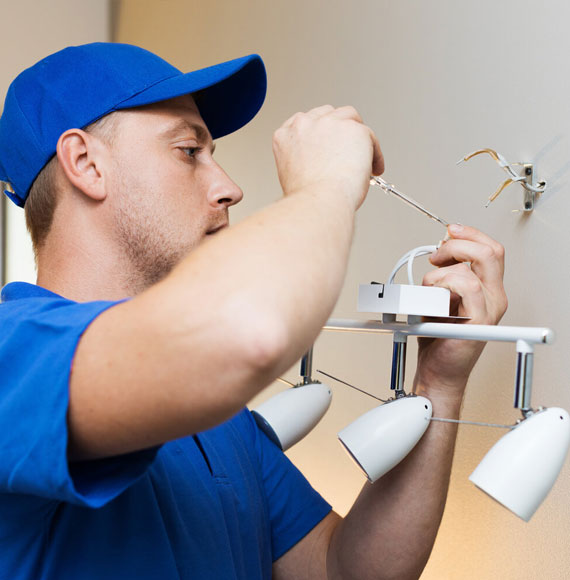
How To Rewire A Lamp
Step 1: Gather Your Tools and Materials:
– Collect the necessary tools such as wire strippers, screwdrivers, and pliers, and ensure you have a lamp rewiring kit with a new cord, socket, and plug.
Step 2: Disconnect the Power:
– Unplug the lamp from the electrical outlet or, if hardwired, turn off the power at the circuit breaker. This ensures your safety during the rewiring process.
Step 3: Disassemble the Lamp:
– Carefully disassemble the lamp, removing the lampshade, bulb, and any other decorative elements. Take note of how the existing wiring is connected.
Step 4: Remove Old Wiring:
– Disconnect the old wiring, unscrewing the socket and exposing the wires. If the wires are wrapped around screws, loosen them to free the old cord.
Step 5: Thread the New Cord:
– Thread the new cord through the lamp, following the same path as the old wiring. Ensure it is securely in place and reaches the socket location.
Step 6: Connect the New Socket:
– Connect the new socket to the wires following the instructions provided in the rewiring kit. Typically, this involves attaching the hot wire to the brass screw and the neutral wire to the silver screw.
Step 7: Attach the Plug:
– If your lamp rewiring kit includes a new plug, attach it to the end of the cord according to the kit instructions. This step is crucial for providing a safe and secure connection to the power source.
Step 8: Test the Rewired Lamp:
– Before reassembling the entire lamp, plug it in and test the rewired components. Ensure the light turns on and off as expected, and there are no electrical issues. Make any adjustments if necessary.
Following these eight steps should help you successfully rewire your lamp, transforming it into a safe and functional lighting fixture.
Common Issues When Rewiring A Lamp
While rewiring a lamp is a manageable DIY project, several common issues may arise. Being aware of these challenges can help you troubleshoot and address them effectively. Here are some common issues when rewiring a lamp:
- Loose or Poor Connections:
– Loose connections between wires and terminals can result in flickering lights or intermittent functionality. Ensure all connections are securely fastened.
- Exposed Wires:
– If wires are not adequately insulated or if there are exposed sections, it can pose a safety hazard. Inspect wires carefully and use electrical tape or heat shrink tubing to cover any exposed areas.
- Incorrect Wiring:
– Connecting wires incorrectly can lead to malfunctions or, in worst cases, electrical hazards. Double-check that you’ve followed the correct wiring scheme, typically provided in the rewiring kit or lamp components.
- Faulty Socket:
– A faulty socket can cause issues with the light bulb not working or flickering. Ensure the socket is securely connected and that there are no loose or damaged parts.
- Incompatible Wattage:
– Using a light bulb with wattage higher than the lamp is designed for can lead to overheating and potential fire hazards. Check and match the recommended wattage for your lamp.
- Damaged Cord:
– If the lamp cord is damaged during the rewiring process or has weak points, it can compromise the electrical connection. Replace any cords that show signs of wear or damage.
- Missing Insulation:
– Insulation is crucial for preventing electrical shocks. Make sure all wires are adequately insulated, and if you notice any damage to the insulation, replace it or use electrical tape to cover the exposed areas.
- Incorrect Plug Attachment:
– If the plug is not correctly attached to the cord, it can result in an unreliable power connection. Follow the instructions provided in the rewiring kit carefully when attaching the plug.
- Grounding Issues:
– Some lamps have a grounding wire for added safety. Ensure the grounding wire is connected properly to reduce the risk of electrical shock.
- Overlooked Parts:
– During the reassembly process, it’s common to overlook certain components, such as washers or screws. Ensure all parts are back in place to avoid instability or misalignment.
- Broken Switch:
– If your lamp has a switch, it could become damaged during the rewiring process. Check the switch for proper functionality and replace it if necessary.
- Bulb Issues:
– If the light bulb doesn’t illuminate, it could be a faulty bulb. Test with a different bulb to rule out any issues related to the rewiring process.
If you encounter any of these issues, carefully review the rewiring steps, inspect the components, and make necessary adjustments. If problems persist or if you’re unsure about any aspect of the process, seeking assistance from a professional electrician is recommended for your safety.
Frequently Asked Questions
It’s advisable to choose a lamp rewiring kit that matches the specifications of your lamp. Different lamps may have specific requirements, so selecting a kit designed for your lamp type ensures compatibility and safety.
Check the lamp’s original specifications or look for wattage recommendations on the socket. Using a bulb with a wattage higher than recommended may lead to overheating and pose a fire risk.
Ensure the lamp rewiring kit includes a grounded (three-prong) plug, or purchase a separate grounded plug. Safety is paramount, so never bypass the grounding wire.
Yes, you can rewire a vintage lamp with a fabric-covered cord. Be cautious with the old cord’s removal to avoid damaging the lamp’s aesthetics. Choose a rewiring kit that complements the vintage style.
Always disconnect the power, use insulated tools, and work in a well-lit area. Wear safety glasses and gloves, inspect all components for damage, and follow the kit instructions diligently to ensure a safe rewiring process.
Yes, you can use an LED bulb in a rewired lamp, as long as the wattage is within the recommended range. LED bulbs are energy-efficient and compatible with most lamp rewiring projects.
Check for loose connections, exposed wires, or incorrect wiring. Ensure the light bulb is functioning, and all components are securely connected. If issues persist, seek assistance from a professional.
Lamp rewiring can be a manageable DIY task, especially with a lamp rewiring kit and clear instructions. However, if you’re uncomfortable with electrical work or encounter difficulties, consulting a professional electrician is recommended.
Conclusions
With the right lamp rewiring kit and a commitment to safety, transforming an old or worn-out lamp becomes an achievable and rewarding DIY endeavor. Remember that each step contributes to not only the aesthetics of your space but also the satisfaction of mastering a practical skill.
References
- thespruce.com – How to Rewire a Lamp
- thisoldhouse.com – How to Rewire a Lamp
- howstuffworks.com – How to Rewire a Lamp in 9 Steps
Recommendations
- How Big is 10 Acres of Land? (Visual Examples for Comparison)
- How Many Months is 60 Days? (Explaining the Calculation Process)
- How Big is 5 Inches? 6 Items with Accurate Measurement
- How Long Are Menards Rebates Good For?
- How Tall Is All Might? Everything To Know About Hero Academia
- How Tall is Kevin Gates? Everything about the Rapper
- How Long Are HS Football Games? (Explained)
- How Tall is Trippie Redd? Everything About the Rapper