Art has the incredible power to capture the beauty and complexity of the human form. As an artist, mastering the skill of drawing bodies with precision and creativity is a journey worth undertaking.
In this comprehensive guide, we’ll explore the art of human anatomy illustration, providing step-by-step insights on how to bring the human body to life on paper or screen.
Table of contents
Understanding Human Anatomy
The human anatomy has a lot, you to know what come in after the other when drawing like the head, hands, legs, etc. So, lay the groundwork for your artistic endeavors. Gain a profound understanding of skeletal structures, muscular systems, and proportions.
This foundation is crucial for creating realistic and compelling illustrations that resonate with viewers.
You can read this: How Long Does Valium Last? Duration of Diazepam in the Body
Basic Anatomy Concepts
Skeleton Structure
- Key Bones to Focus On: Understanding the basic structure of the skeleton is crucial. Focus on key bones like the skull, spine, and limbs to create a strong foundation for your illustrations.
- Understanding Joint Connections: Knowing how joints connect and move is essential for capturing realistic poses. Study the range of motion in joints to add fluidity to your drawings.
Muscular System
- Major Muscle Groups: Identify and familiarize yourself with major muscle groups. This knowledge will enhance your ability to portray muscle definition and movement accurately.
- Muscle Movement and Function: How muscles move and function is vital for dynamic and lifelike illustrations. Know the mechanics of muscle contraction and extension.
Also, Read this: How to Measure Hips: Accurate Body Measurements
Essential Tools to Use
Here are the essential tools to use:
- Pencils
- Erasers
- Papers
- Fine liners
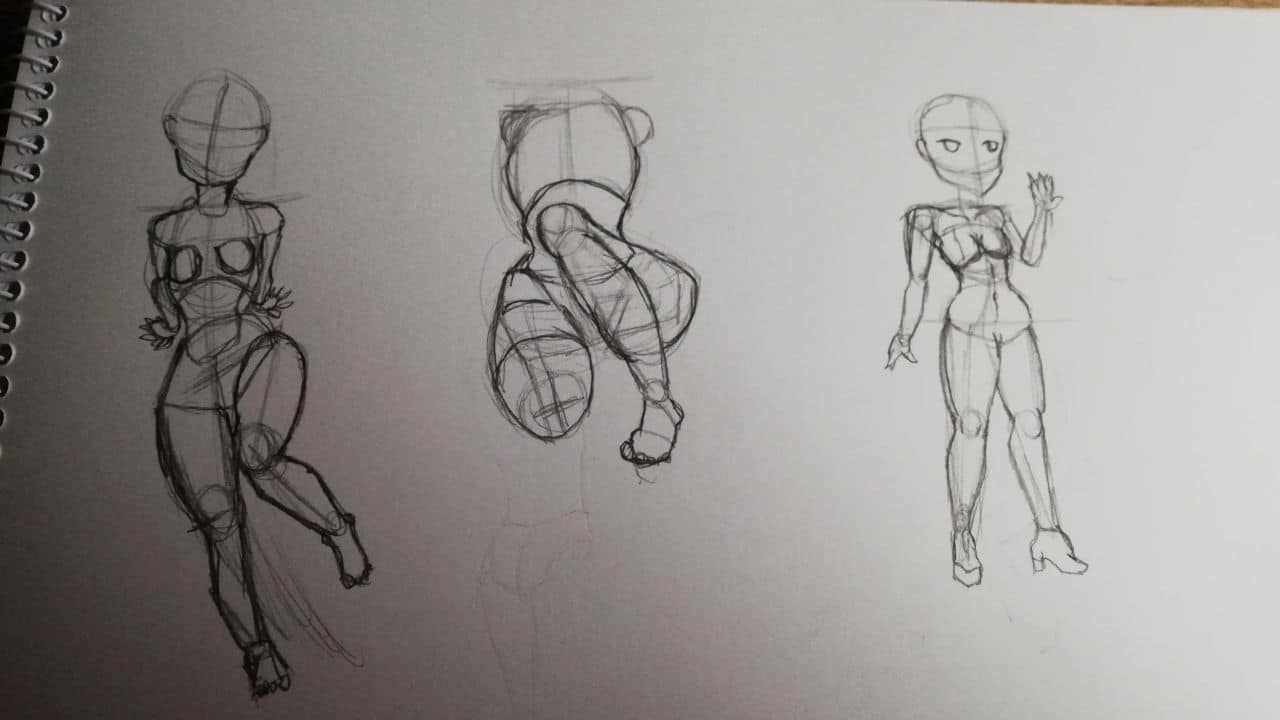
Step by Step Guide on How to Draw Bodies
Drawing bodies can be a rewarding and enjoyable artistic endeavor. Here’s a step-by-step guide to help you get started:
#1. Understand Body Proportions
Before you start drawing, it’s essential to understand the basic proportions of the human body. The average human body is about seven to eight heads tall. Here’s a simple breakdown:
- The head is roughly one-eighth of the total height.
- The torso is about three heads long.
- Also, the legs make up the remaining four to five heads.
#2. Start with Basic Shapes
Begin by sketching the basic shapes to outline the body. Use circles for joints like the shoulders, elbows, hips, and knees. Connect these circles with lines to represent the limbs.
#3. Define the Torso
Draw a longer shape to represent the torso. This shape can be cylindrical or more box-like, depending on the pose and the body type you’re drawing.
#4. Add Limbs
Extend lines from the torso to represent the arms and legs. Keep in mind the joints and use simple shapes to indicate the hands and feet.
You can check this: How to Crack Lower Back: Spinal Relief Techniques
#5. Define the Head
Place a circle at the top of the torso to represent the head. Divide it into halves horizontally and vertically to help position facial features later on.
#6. Refine the Body Outline
Once you have the basic shapes in place, start refining the outline of the body. Use curved lines to create more natural and organic shapes.
#7. Add Facial Features
If your drawing includes a face, add the eyes, nose, and mouth. Pay attention to the proportions and placement of facial features. Eyes are usually placed in the middle of the head, and the nose is often halfway between the eyes and chin.
#8. Detail the Hands and Feet
Hands and feet can be challenging, but breaking them down into basic shapes makes it more manageable. Fingers and toes can be represented by simple lines.
Also, check this: How to Crack Your Neck: Relief Techniques for Tension Release
#9. Add Clothing and Hair
If your character is wearing clothes, add the details of the outfit. Consider the folds and creases in the fabric. For hair, use flowing lines to give it a natural look.
#10. Refine and Add Details
Refine the details of your drawing, paying attention to smaller features like facial expressions, muscle definition, and any additional details you want to include.
Tips: How to Draw Bodies
- Practice Gesture Drawing: Gesture drawing involves capturing the essence and movement of a pose quickly. It helps improve your understanding of body dynamics.
- Study Anatomy: Familiarize yourself with the basic anatomy of the human body. Knowing how muscles and bones work will enhance the realism of your drawings.
- Observe Real Life: Pay attention to people’s postures and movements in real life. This can provide valuable insights for your drawings.
See also: How to Draw a Duck: Wildlife Artistry
FAQs
Mastery varies, but consistent practice over months to years is essential.
Both have merits; choose based on personal preference and project requirements.
Misinterpreting proportions, neglecting details, and over-complicating illustrations are common pitfalls.
Experiment with new subjects, take breaks, and find inspiration in everyday experiences.
Joining art communities provides support, feedback, and exposure, enhancing your growth as an illustrator.
Conclusion
Drawing bodies is a continuous learning process that requires dedication and practice. By mastering basic principles, embracing your unique style, and engaging with a supportive community, you’ll unlock your artistic potential.
Remember, every stroke brings you closer to becoming the artist you aspire to be.