In a world that cherishes finished walls, Drywall plays a vital role, especially shaping our living spaces. Despite its frequent oversight, it stands as an integral to modern construction. If you are curious about how Drywall works? Look no further; we’ve got you covered.
From the basics to the full details, this guide will walk you through the fascinating world of drywall installation, unveiling the seamless process that transforms raw materials into sturdy walls.
Table of contents
What is Drywall?
Drywall, also known as plasterboard, wallboard, gypsum board, or sheetrock, is a panel made of gypsum plaster pressed between two thick sheets of paper.
It is widely used in the construction of interior walls and ceilings. Drywall provides a smooth, flat surface that can be easily painted or finished with wallpaper. In addition, it offers versatility, affordability, and ease of installation.
How Does Drywall Work?
Drywall serves as a building material that creates smooth, durable surfaces for interior walls and ceilings. It works by:
- Providing Structure: Drywall panels are attached to the structural framework of a building, creating a solid and stable surface.
- Covering Insulation: Drywall is often used to encase and protect insulation materials within walls and ceilings.
- Creating a Finished Surface: Once installed, drywall provides a canvas for various finishing materials, such as paint, wallpaper, or decorative textures.
- Fire Resistance: Specialized types of drywall can enhance a structure’s fire resistance, providing an additional layer of safety.
- Soundproofing: Certain types of drywall are designed to reduce sound transmission, making them ideal for use in areas where noise control is important.
You can read this: How to Repair an Oven: Tips and Guidelines
History of Drywall
The use of gypsum as a building material dates back to ancient civilizations, including the Egyptians and Greeks. However, modern drywall as we know it was developed in the early 20th century.
In 1916, the United States Gypsum Corporation (USG) introduced Sheetrock, the first commercially available gypsum board.
This innovation revolutionized the construction industry by offering a faster and more efficient alternative to traditional plaster and lath construction methods.
How is Drywall Made?
The production process involves mixing the gypsum powder with water to form a slurry, which is then poured onto a layer of paper.
Another layer of paper is added on top, and the entire assembly is passed through a series of rollers to flatten and compact the materials.
So, the resulting sheet is then cut into standard sizes and dried. Here are the key components
#1. Gypsum Mining
The primary component of drywall is gypsum core, a soft sulfate mineral composed of calcium sulfate dihydrate which is found in various parts of the world. Also, gypsum core is extracted through mining.
Also, read this: How to Do Home Electrical Repairs on Your Own: Full Guide
#2. Gypsum Processing
The mined gypsum is heated and ground to produce a fine powder. This powder is then mixed with water to form a slurry.
#3. Sheet Formation
The slurry is poured onto a layer of paper that serves as a facing material. Another layer of paper is placed on top of the slurry.
Furthermore, the paper facing serves multiple purposes. It provides a smooth surface for painting or wallpapering, adds strength to the drywall, and helps to protect the gypsum core from damage.
- Front Facing: The front-facing paper is the side that is typically finished with paint, wallpaper, or other decorative materials.
- Back Facing: The back-facing paper is not as smooth and is designed to adhere well to the framing structure. It also helps prevent the gypsum core from warping.
#4. Additives
Various additives may be included in the manufacturing process to enhance specific properties of the drywall. These can include fire-resistant chemicals, mold inhibitors, and strengthening agents.
Check this: How to Paint Galvanized Metal in Simple Steps | Picture Guide
#5. Pressing and Drying
The entire assembly is passed through a series of rollers to flatten and compact the gypsum between the paper layers. Therefore, the sheets are then dried.
#6. Cutting and Packaging
So, once dried, the large sheets are cut into smaller panels, which are then packaged and ready for distribution.
Types of Drywall
Here are the types of Drywell:
- Regular Drywall (White Board): This is the standard drywall used in most applications in dry places.
- Greenboard: This type has a moisture-resistant facing, making it suitable for areas with high humidity, like bathrooms and kitchens.
- Blueboard: Designed for veneer plastering, it has an absorbing face paper that bonds well with wet plaster.
- Fire-Resistant Drywall: This also contains additives that slow down the spread of flames, providing increased fire protection.
- Soundproof Drywall: Incorporates additional materials to reduce sound transmission between rooms.
- Mold-Resistant Drywall: Contains additives that inhibit the growth of mold in damp conditions.
- Flexible Drywall: Used in curved or arching applications.
Also, check this: How is Fabric Created?
Tools and Materials for Drywall Installation
Tools:
- Utility Knife: For cutting drywall sheets.
- Drywall T-Square: Helps in making accurate cuts.
- Drywall Saw or Jab Saw: Used for cutting openings and curves.
- Drywall Screw Gun or Drill: For fastening drywall screws efficiently.
- Measuring Tape: Essential for accurate measurements.
- Drywall Rasp: Smoothens rough edges of cut drywall.
- Mud Pan and Taping Knives: For applying joint compound.
- Drywall Sanding Block or Sanding Pole: Used for sanding joints.
- Corner Bead Tool: Ensures proper installation of corner beads.
- Stilts or Drywall Lift: Helpful for reaching higher areas.
Materials:
- Drywall Sheets: Choose appropriate thickness (1/2 inch is common).
- Drywall Screws: Ensure they are the right length for the thickness of the drywall.
- Joint Compound (Mud): Premixed or powder form for taping and finishing joints.
- Drywall Tape: Paper or fiberglass mesh for reinforcing joints.
- Corner Beads: Metal or vinyl strips for protecting corners.
- Joint Tape: Self-adhesive mesh tape for joints.
- Drywall Primer and Paint: For finishing the installation.
See also: How To Get An International Job To Work In Your Home Country
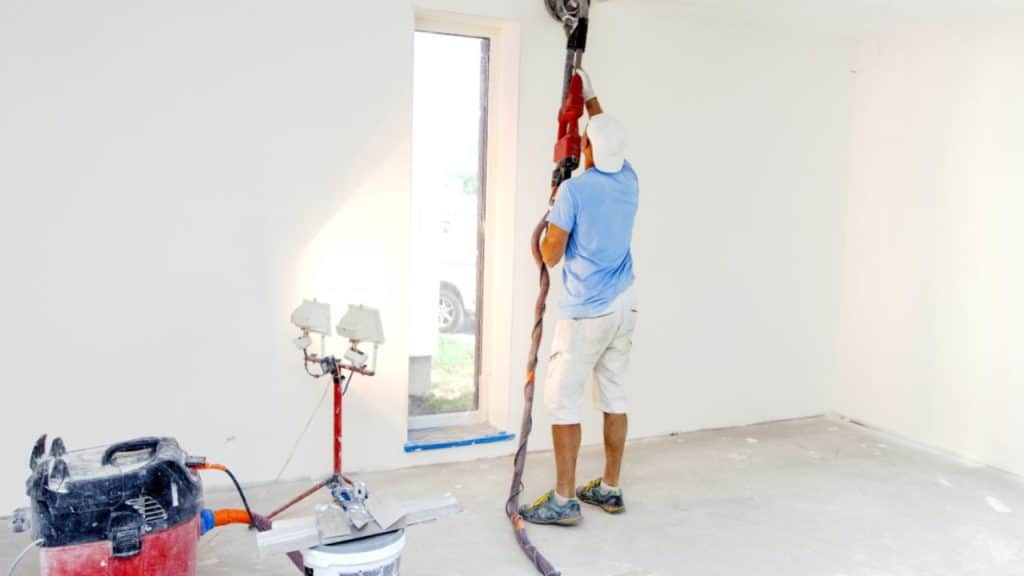
Steps on How to Hang Drywall:
#1. Preparation
- Measure and Plan: Measure the wall or ceiling dimensions and plan the layout to minimize the number of seams.
- Prepare the Studs: Ensure that the studs are properly spaced (usually 16 inches apart) and mark them.
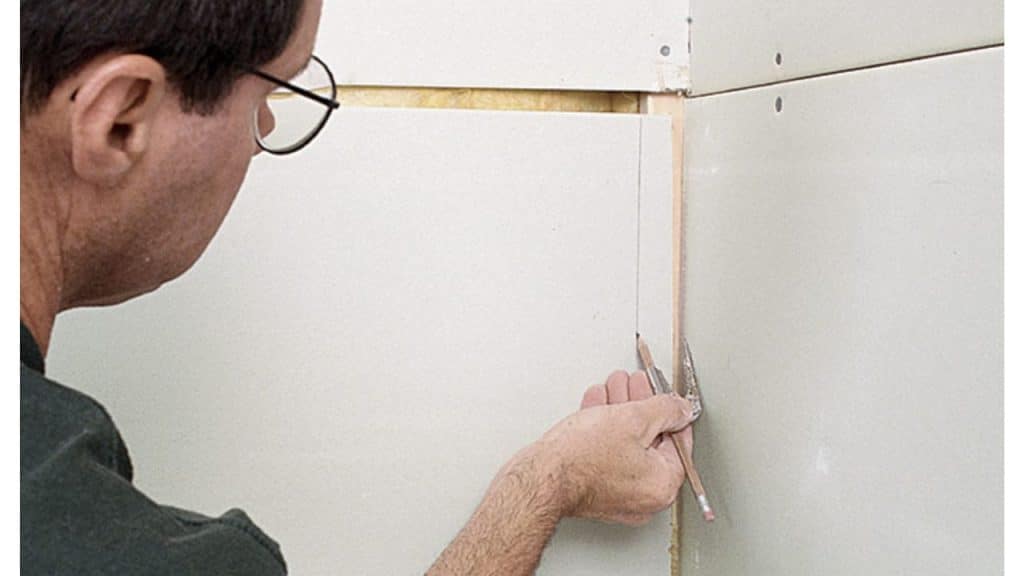
#2. Cutting Drywall
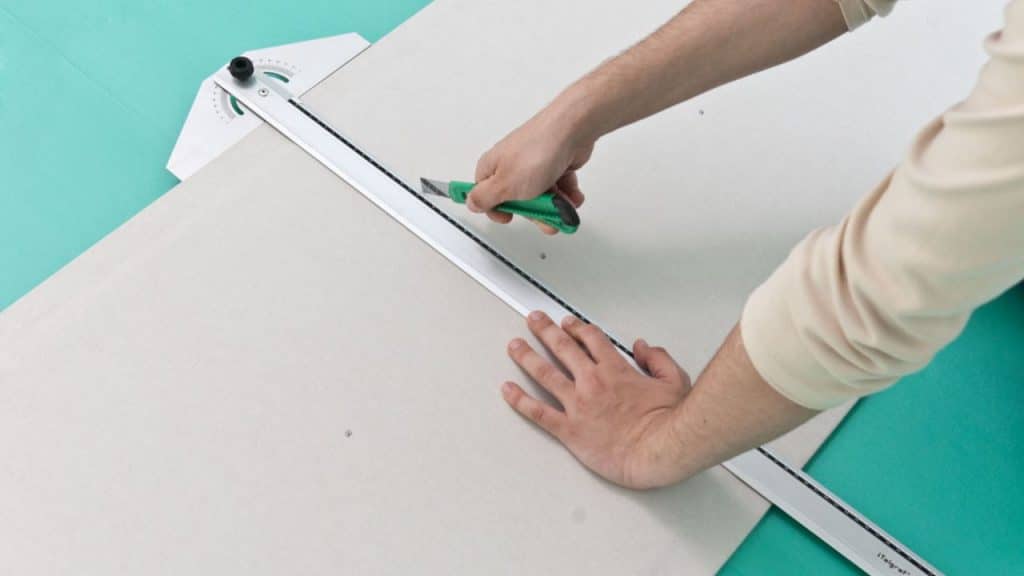
- Measure and Mark: Use a T-square and measuring tape to mark the dimensions on the drywall.
- Cutting: Score the front of the drywall with a utility knife and then snap it along the score line. Use a saw to cut through the paper backing.
Related post: 10 Best Tools for New Homeowner in 2023 | Best Tools
#3. Hanging Drywall
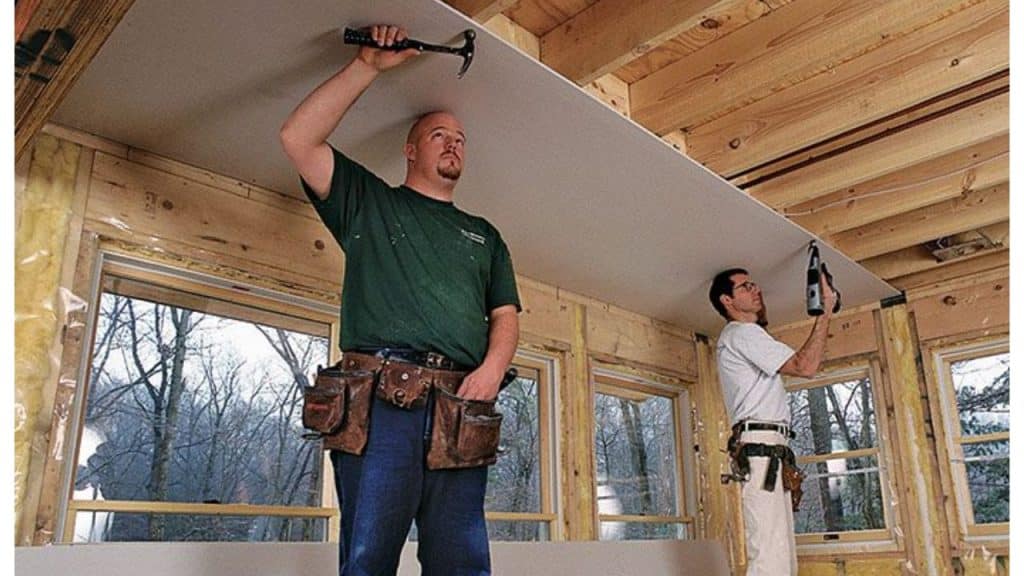
- Start at the Top: Begin hanging drywall from the top, working your way down.
- Screwing: Use a drywall screw gun or drill to attach the drywall to the studs. Place screws every 8 inches along the edges and every 12 inches in the field.
#4. Taping and Mudding
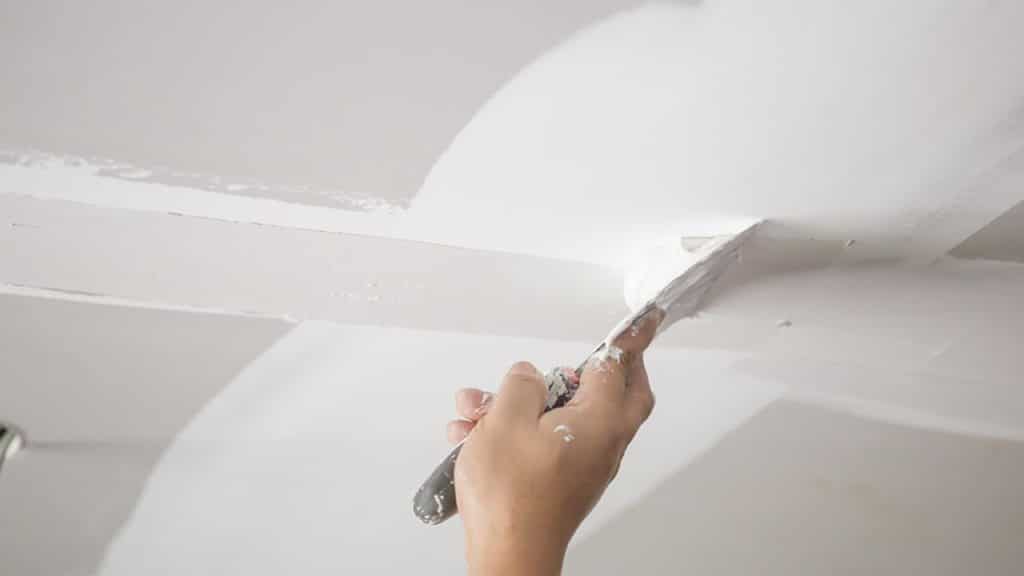
- Apply Joint Tape: Place joint tape over the seams.
- Mud Joints: Use a taping knife to apply a thin layer of joint compound over the tape. Allow it to dry.
- Repeat: Apply additional layers of mud, widening each layer to feather the edges.
#5. Sanding and Finishing
- Sanding: Once the mud is dry, sand the joints to create a smooth surface.
- Prime and Paint: Apply primer and paint to finish the drywall.
Read also: How to Get Rid of Permanent Marker Stains
DIY Drywall Installation Tips
- Safety First: Wear safety gear, including goggles and a dust mask.
- Teamwork: Enlist the help of a friend, especially when handling larger sheets.
- Take Breaks: Drywall installation can be physically demanding; take breaks to avoid fatigue.
- Quality Tools: Invest in good quality tools for a smoother installation process.
Expert Tips for Hanging Drywall
Following these tips, it should help you achieve a professional-looking drywall installation for your DIY project.
- Measure Twice, Cut Once: Double-check measurements before making cuts to avoid errors.
- Use the Right Screw Length: Choose screws that are the right length to secure the drywall without penetrating too far.
- Avoid Seams in High-Traffic Areas: Minimize seams in areas prone to damage or heavy use.
- Properly Mix Joint Compound: Follow the manufacturer’s instructions for mixing joint compound to achieve the right consistency.
- Feather Mud Edges: Gradually widen each layer of mud when finishing joints to create a seamless look.
- Sand Between Coats: Sand lightly between coats of mud for a smoother finish.
- Prime Before Painting: Applying primer before paint enhances adhesion and ensures a consistent finish.
See also: Best Grants for Home Improvements in UK | 2023 Application Guide
Advantages of Drywall
Here are the advantages of Drywall.
- Ease of Installation: Drywall is relatively easy to install compared to traditional plaster walls. It comes in large sheets that you can quickly attach to wall studs or ceiling joists.
- Cost-Effective: Drywall is a cost-effective material, both in terms of material and labor costs. It is more affordable than many alternative wall-covering materials.
- Versatility: Also, you can easily cut and shape Drywall to fit any room or space. It allows for the incorporation of various architectural designs, such as arches and alcoves.
- Smooth Finish: Drywall provides a smooth and uniform surface, ideal for painting or wallpapering. The surface is consistent, making it easier to achieve a professional-looking finish.
- Fire Resistance: They manufacture many types of drywall with fire-resistant properties, providing an added layer of safety to buildings.
- Sound Insulation: Drywall has good soundproofing properties, helping to reduce the transmission of sound between rooms or from outside.
- Energy Efficiency: Drywall can contribute to energy efficiency by providing insulation. Some types of drywall come with added insulation material, enhancing the thermal performance of walls.
- Quick Drying: Unlike plaster, which can take a long time to dry, drywall compounds dry relatively quickly, allowing for faster construction timelines.
- Easy Repairs: In the event of damage, drywall is easier to repair than plaster. you can easily patch and smooth out Small holes, cracks, or dents without requiring extensive expertise.
- Mold Resistance: Also, they design Some types of drywall to resist mold growth, making them suitable for areas prone to humidity or moisture.
Common Drywall Issues
Regular maintenance and prompt repairs can help mitigate many of these common issues, ensuring the longevity and aesthetic appeal of drywall in residential and commercial spaces. Here are the common drywall issues.
- Cracks: Drywall can develop cracks due to settling, temperature changes, or structural movement. These cracks are usually repairable with joint compound.
- Water Damage: Exposure to water can lead to mold growth, discoloration, and deterioration of drywall. Promptly addressing water leaks and damage is crucial to prevent further issues.
- Nail Pops: Over time, the nails or screws used to attach drywall to studs may pop out, creating small protrusions. This is often a cosmetic issue but you can fix it by reattaching the drywall.
- Joint Tape Issues: Problems with joint tape, such as bubbling or peeling, can occur if the tape was not applied correctly or if there is movement in the wall.
- Dents and Dings: Drywall is susceptible to dents and dings from impacts. You can repair these with spackle or joint compound.
- Sagging: In some cases, drywall may sag or become uneven over time. This can be due to poor installation or changes in humidity. Reinforcement or replacement may be necessary.
- Mold Growth: In areas with high humidity or water exposure, mold can develop on drywall. Using mold-resistant drywall and addressing moisture issues can help prevent this problem.
- Texture Issues: Achieving the desired texture on drywall can be challenging for inexperienced individuals, leading to uneven or undesirable finishes.
Related Post: Cleaning Vinegar vs. White Vinegar: Uses Around the House
FAQs About Drywall
Absolutely! Drywall provides a paint-ready surface. Ensure it’s clean, dry, and primed for the best results.
Opt for moisture-resistant drywall in bathrooms to prevent damage from humidity and moisture.
Yes, with the right guidance and tools, beginners can successfully install drywall.
No, you can’t. Moisture-resistant drywall is better suited for areas prone to high humidity.
On average, a team of professionals can hang drywall in a standard room in one to two days.
Yes! Small holes are easily patchable with a bit of joint compound and sanding.
Conclusion
Understanding how drywall works opens up a world of possibilities for homeowners, builders, and designers alike.
From its composition to the installation process, drywall proves to be a reliable and versatile solution for creating aesthetically pleasing and structurally sound interior spaces.
Embrace the art of drywall installation, and watch as your vision for a stunning living or working space comes to life.
References
Recommendations
DISCLOSURE: This post may contain affiliate links, meaning when you click the links and make a purchase, we receive a commission.


1 comment
Comments are closed.