This tutorial provides a step-by-step guide on drawing a giraffe, prioritizing the initial establishment of the crucial head shape. It then proceeds to illustrate the creation of the large eyes, ears, and nose. While none of the steps are overly intricate, the emphasis lies in accurately placing elements in their correct positions and proportions, significantly impacting the overall outcome.
For students engaged in giraffe-related studies or harboring a fascination for these animals, crafting a portrait through drawing offers an enjoyable means to express admiration. However, the distinctive features of the somewhat peculiar head, including the horns, wide eyes, and expansive mouth, require careful attention, as they truly set the giraffe apart from other creatures.
Learn how to draw a giraffe step by step and easy enough for beginners, so start a sketch with this guide.
Table of contents
- What Materials Can Be Used To Draw a Giraffe?
- Directions for Giraffe Head Project
- What Is The Basic Shape To Start With When Drawing A Giraffe?
- How Do I Draw The Giraffe’s Distinctive Spots?
- Should I Draw The Giraffe’s Horns On Top Of Its Head?
- How Do I Add Facial Features To The Giraffe?
- FAQs On Giraffe
- Conclusion
- References
- We Also Recommend
What Materials Can Be Used To Draw a Giraffe?
Here’s a list of materials used in drawing a giraffe:
- Drawing Paper. This is the good stuff you can buy in bulk for a good price.
- Pencils. I like how this brand always makes nice dark lines.
- Black Marker. A permanent marker will give you a dark black color.
- Crayons. The larger packs are nice for more color choices.
Directions for Giraffe Head Project
Time needed: 30 minutes
How to Draw a Giraffe Head
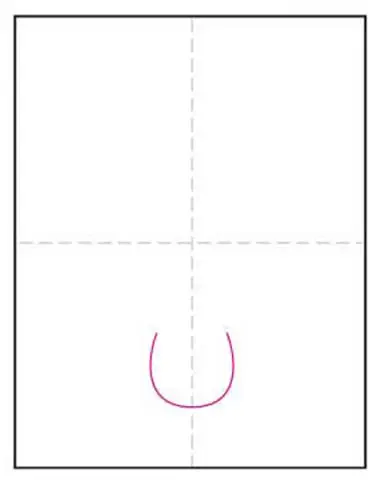
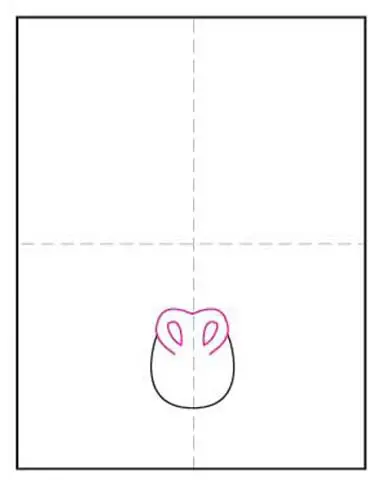
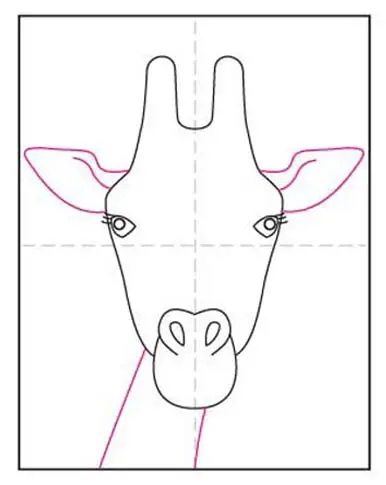
- Draw a large U for the mouth.
- Add the nostrils on the top.
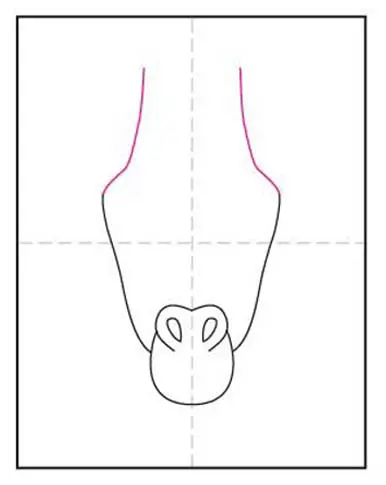
- Start the sides of the head.

- Angle in and draw up for horns.
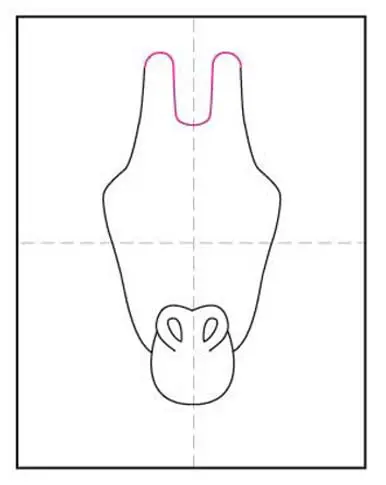
- Finish the symmetrical horns.
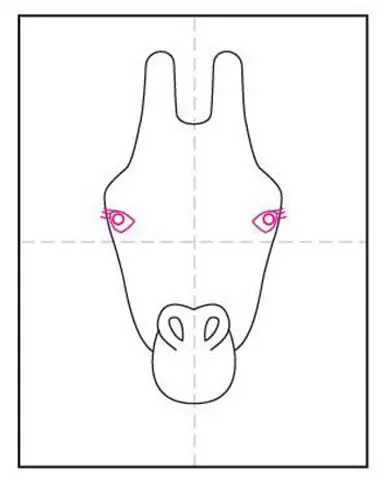
- Draw the large eyes.
- Add ears and neck.
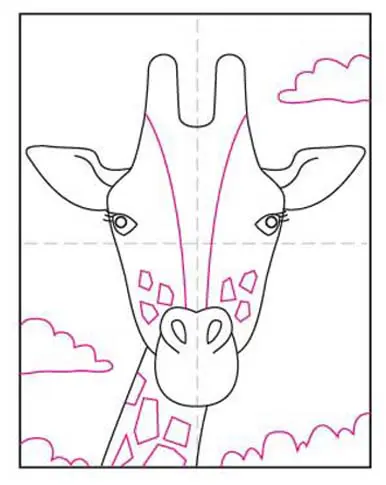
- Add patterns and background.
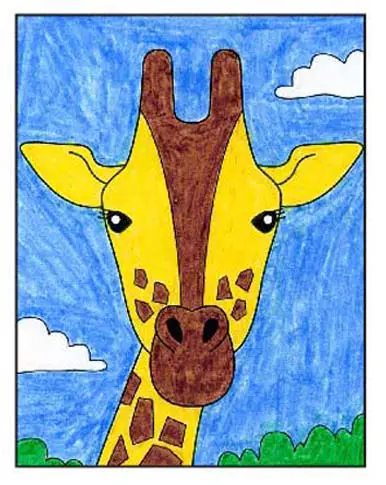
- Trace with marker and color.
What Is The Basic Shape To Start With When Drawing A Giraffe?
Begin by sketching the basic shapes that make up a giraffe, such as an elongated oval for the body and a long, slender rectangle for the neck.
How To Draw a Giraffe Step-by-Step
The hardest thing in drawing giraffes, like with any animal artwork, is figuring out where to begin. Your sketched giraffe will start with a few very basic building shapes and lines in this lesson.
Drawing giraffes is very enjoyable using the building approach because of their distinctive dimensions. Before you start adding color and details, you may use construction lines to ensure that your sketched giraffe has the correct proportions.
Here’s a step-by-step outline of how to draw a giraffe:
READ ALSO: How to Draw a Spider Web: Natural Design Artistry
Step 1: Constructing the Main Body Shape
It is always best to begin a drawing by constructing the largest element. Having the largest part of your animal’s body down on paper can make the placement of the smaller parts much easier. As such, let us begin by using a construction oval to represent the main torso of your giraffe drawing. This oval should be horizontal.
Step 2: Placing the Giraffe Head
Before we attempt to lay down the neck of your giraffe drawing, we will place the giraffe head in the top left corner of the canvas. Having the giraffe head placed on the canvas will make the construction of the neck significantly easier.
Step 3: Beginning to Draw the Giraffe Face
To begin laying the foundations for the giraffe face, we are going to construct the shape of the muzzle. Extending from the bottom left side of the head circle, draw a slightly pointed half-oval shape.
Step 4: Adding Horns and Ears to Your Giraffe Head
This fourth step in the easy giraffe drawing tutorial is very quick and simple. On the top of the giraffe head, draw a curvy “M” shape to represent the two short horns. On either side of the horns, draw a small curved ear.
Step 5: Connecting the Giraffe Head and Body with the Neck
In this step, you are going to use the shape of the giraffe’s long curved neck to join the head and body. Begin at the giraffe head, taking the top neckline from the meeting point of the right ear and head circle. Gently curve this lineup and then down to meet the body oval at the central point. For the underside of the neck, draw a straighter line down from the bottom of the head to meet the body oval.
Step 6: Placing the Front Legs of Your Giraffe Drawing
On the whole, giraffes have very long and thin legs that look a little unsteady. To capture the movement of your giraffe, one of the front legs will be bent as if it is stepping forward. This bent leg is the one closest to our perspective, so we are going to draw this one first.
Begin drawing the thigh segment of this first leg at the bottom of the left side of the main body oval. Curve the two lines in and down, and then create a rounded knee. At the knee, begin to separate the leg by drawing a straighter segment that extends towards the back of your giraffe drawing and ends in a hoof.
Step 7: Drawing the Back Legs of Your Giraffe
Drawing giraffe legs is easy after you have mastered the basic technique, as all of them follow the same pattern. The two main distinctions to note with the rear legs are that they are a little thicker at the top and that the thigh has a noticeable curvature at the back.
Draw the leg closest to our viewpoint first; that is, the whole leg, with the back curve starting at the rear point of the oval for the main body. These rear legs have broader and higher knees than the front ones. With the hoof extending forward, the initial rear leg will bend in the opposite way as the front leg.
Step 8: Outlining the Tail of Your Giraffe Drawing
For this final construction step, you are simply going to outline the giraffe’s tail. The tail is quite long, ending just below the knees of the back legs. Begin the tail outline at the back of the main body oval, and curve it down.
READ ALSO: How to Draw a Duck: Wildlife Artistry
Step 9: Creating the Final Outline of Your Easy Giraffe Drawing
The time for construction is over, and we are now going to use all of the foundational lines to create the final outline of our giraffe drawing. In this step, you are going to add details to the giraffe’s face, including the giraffe’s eyes and nostrils, and you are going to add details to the main, horns, and ears.
Begin at the head, following the outline of the construction lines and adding a little curve at the nose to create the mouth separation. Next, for the signature giraffe eyes, draw a little almond shape on the head and another half-eye on the side. Add two little nostril shapes on the nose and add details to the horns and ears.
Step 10: Creating the Signature Pattern Detail
It’s time to design that lovely pattern now that you have the giraffe’s outline done. Starting with the face, sketch a few tiny, angular outlines around the chin and eyes.
As you proceed down the giraffe’s neck in this manner, the forms get progressively larger until you reach the chest. Draw forms around the neck’s borders, bending them slightly to give the impression that they wrap around.
READ ALSO: How to Draw a Book: Artistic Guide to Illustrating Literature
Step 11: Adding Texture Throughout Your Giraffe Drawing
In this step, use a few short texture lines throughout the body of your giraffe to add depth and texture.
Step 12: Applying the First Coat of Color
If you take a look at the final giraffe drawing, you will notice that there is quite a lot of color variation in the coat. To achieve this look, we are going to build up the final color using several different layers.
Step 13: Adding Definition with the Second Coat of Color
A mild shade of brown will be your second color for your simple giraffe artwork. In order to give your giraffe the appearance of three dimensions, use this color to delicately sculpt out its body structure and add depth.
Apply brown to the face’s center ridge and the horns. Additionally, you might add a stroke along the underside of the neck and color the tips of the primary color brown.
READ ALSO: How to Draw Shoes: Unleashing Creativity in Fashion Illustration
Step 14: Adding Color to the Pattern
In this coloring step, you are going to add color to all the shapes of the pattern we created earlier. The ideal shade for this step is a slightly burnt orange, as you do not want it to be too bright.
Step 15: Adding Depth to the Pattern
For this quick and easy step, you are simply going to use a small soft brush and a touch of black paint to add shading to the pattern shapes.
Step 16: The Final Shading Touches
In this final shading step, you are going to use a little more black paint and a small soft brush to add the final dimension throughout your giraffe drawing. Begin at the head, adding shadows to the nostrils, horns, ears, and other facial features. Continue down the neck, adding shadows where you would not expect natural light to fall.
Step 17: Adding the Finishing Touches to Your Giraffe Drawing
If you are happy with your giraffe drawing, then you can leave it as it is. If, however, you want a more seamless finished product, you can now erase the outlines. If you are using a graphic tablet, this step is little more than a click of your pen. For those of you using a more physical medium, you can simply use the corresponding color at each point of the outline to trace over it.
READ ALSO: How to Draw Hello Kitty: Iconic Character Illustration Skill
How Do I Draw The Giraffe’s Distinctive Spots?
Giraffe spots are irregular shapes that are often somewhat rectangular or oval. They can be drawn by adding clusters of these shapes across the body and neck.
Should I Draw The Giraffe’s Horns On Top Of Its Head?
Yes, giraffes have ossicones, which are horn-like structures on their heads. They are usually small and covered with skin and hair. Draw them near the top of the giraffe’s head.
How Do I Add Facial Features To The Giraffe?
Draw the eyes, nose, and mouth with simple shapes. Giraffes have large, expressive eyes, and their mouths are often depicted closed.
FAQs On Giraffe
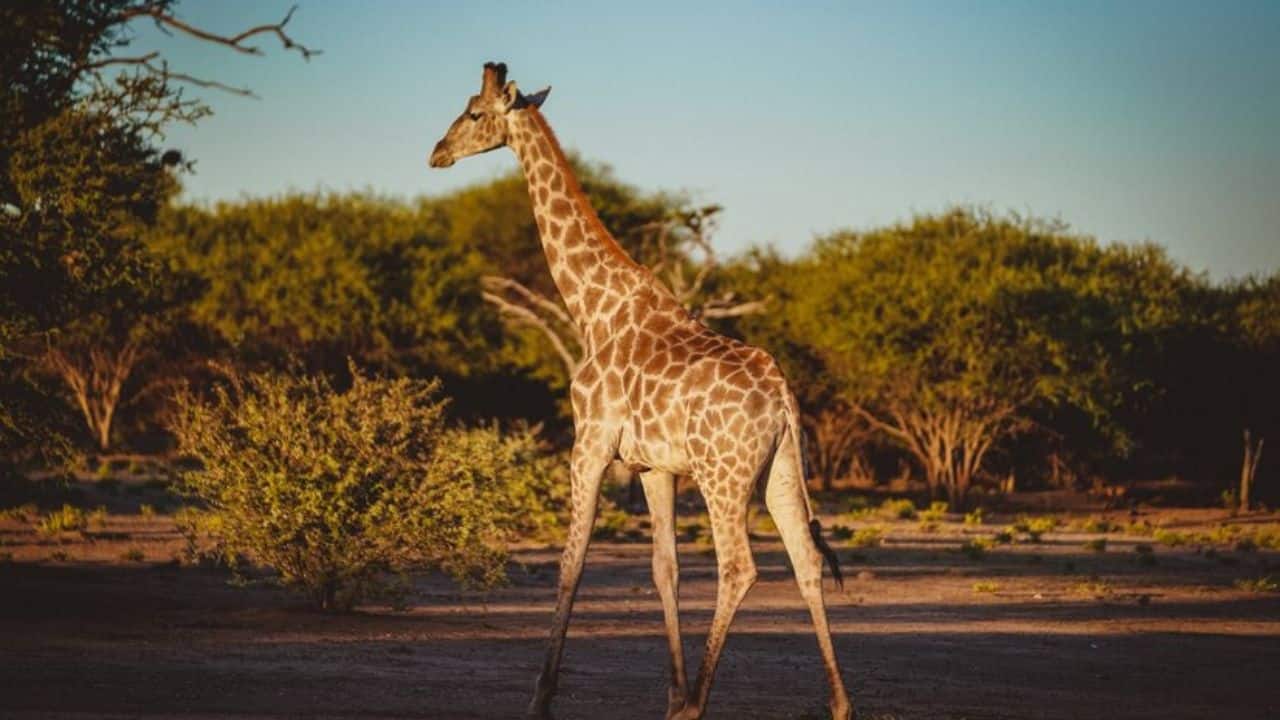
A giraffe is a large, long-necked mammal native to Africa. It is the tallest living terrestrial animal and is known for its distinctive spotted coat and long neck.
Giraffes are native to various countries in Africa, including savannas, grasslands, and open woodlands.
Giraffes have long necks to reach high branches of trees and access foliage that is not reachable by other herbivores. This adaptation helps them feed on a variety of vegetation.
Absolutely! You can add a simple background, such as a savanna landscape with trees, to give context to your giraffe drawing.
Giraffe ears are usually small and pointed. Draw them on either side of the head, near the ossicones.
Conclusion
Drawing giraffes is very enjoyable using the building approach because of their distinctive dimensions. Before you start adding color and details, you may use construction lines to ensure that your sketched giraffe has the correct proportions.
References
- wedrawanimals.com – How To Draw A Giraffe
- artprojectforkids.org – Easy How to Draw a Giraffe Head Tutorial and Giraffe Head Coloring Page