Folding a letter into an envelope is one creative activity you would want to try because it gives a professional look an extra special classy look.
This guide will guide you on how to fold a letter into an envelope in various ways. Carefully read through!
Table of contents
- 1. How To Fold A Standard Sized Envelope
- Step 1: Cut to Size
- Step 2: Fold into two
- Step 3: Fold Down Corners
- Step 4: Fold Bottom Up
- Step 5: Fold Bottom Up Again
- Step 6: Fold the Top Down
- Step 7: Fold the Sides
- Step 8: Fold Tabs Up
- Step 9: Complete the folding
- How To Fold A Letter Into An Envelope with Beveled Corners
- Step 1: Fold into two equal parts
- Step 2: Rotate and Fold Corners
- Step 3: Now Fold Sides
- Step 4: Fold Corners In
How To Fold A Standard US Business Letter For A Standard Business Envelope
Here’s a step-by-step outline of how to fold a standard US business letter for a typical business envelope.
Step 1: Write on the envelope

To avoid leaving dents in the paper, handwrite the recipient’s information on the envelope before inserting the letter. You can also print the address on the letter to give t a more professional look.
You should write the receiver’s address on the front of the envelope in the center (e.g., if you are in the US: name, address, city, state, and zip code), and the return address, which is yours (your name, address, city, state, and zip code) in the top left-hand corner.
READ ALSO: How to Write a Statement Letter in 2022 | Easy Step by Step Guide
Step 2: Keep the letter face up on a table

Before folding the letter to fit into an envelope, check that the details are correctly written and well-spelled. Also, ensure that you have signed the letter.
Please note that the text should e facing up to you and not down.
Step 3: Fold the bottom part of the letter up

Hold the bottom edge of the letter and fold it up so that the boundary lines up about one-third of the page. If you are not sure of what one-third is, take your envelope and place it under the middle of a letter to get the perfect dimension.
SEE ALSO: How To Start A Letter In Spanish In 2022 | Sample
Step 4: Ensure that the edges are correctly lined

Before you tuck the fold, ensure that the outer edges of the letter all line up perfectly to avoid uneven creases. If your edges are not well lined, your letter may not fit into the envelope. Once you are sure, the letter is lined up, use your finger to press down the fold carefully.
Step 5: Fold the top part downwards

At this point, you are expected to fold the letter’s top part downwards so there will be about 1 cm of space between the lower crease and the leading edge of the letter.
You can use your envelope as a guide to ensure you get the right dimensions.
RECOMMENDED: How To Put An Accent Over A Letter | Full & Easy Guide
Step 6: Line the top fold

At this point, you are to line up the top part of the fold alongside the edges of the page to get a clean fold. You can use a ruler to make it smooth.
Step 7: Put the letter into an envelope

Take the letter and fold it so that the folds face out and the top fold coincides with the top of the envelope. Hold the envelope so the flap faces you and opens in your direction. Please insert the letter carefully into the envelope so it does not dent the page.
The letter should be folded so that the receiver can bring out the letter and open it without having to turn it right-side up to read it.
Been wondering How to Write a Recommendation Letter for a Student? See full guide
How To Fold A Standard US Business Letter For a No. 10 Windowed Envelope
Here’s how to fold a standard US business letter into a no.10 windowed envelope.
Step 1: Format the letter correctly

For those that prefer using an envelope with a see-through window that shows the receiver’s details, it is necessary to format the letter, so the information fits appropriately.
Here’s how to format the letter correctly:
- To style a business letter, ensure your word processor’s margins are set to 1 inch (2.5 cm) on all sides. While typing the date and the recipient’s address, ensure the content is aligned to the left-hand side of the page.
- Additionally, the letter should be single-spaced. In between paragraphs, there should be two spaces. The entire letter should be left aligned.
- There should be around 2 inches (5.1 cm) of vacant space between the top of the page and where you input the first line of text (the date).
- Type out the date in full (e.g. May 1, 2020 instead of 5/1/2020).
- Type enter two times to create a space between the date and where you will type the recipient’s details.
- Type out the name of the recipient in full (e.g. Mr. Steven John), press enter, and type the receiver’s address, type enter again, and then key in the recipient’s city, state, and zip code.
- Include a space between the contact details for the recipient and the salutation.
YOU MAY WANT TO SEE: How to Write a Cover Letter with no Experience
Step 2: Fold the letter into a “z fold”

Here, you need to fold the letter so that the receiver’s details face upwards. This type of folding enables the receiver’s details to show through the window.
If you want to keep the details privy, opt for a standard envelope with no window.
Step 3: Make sure the text faces down

When folding a letter for a standard US business letter for a no. 10 windowed envelope, start with the letter so the text can face down. Having the tet face down makes it easier to spot the name and address of the recipient.
Step 4: Place the letter upside down

The letter should be placed upside down so that the receiver’s details are closest to you while folding.
CHECK THIS OUT: How To Write A Professional Resume Summary + Examples
Step 5: Fold the top downwards

Fold the from the top towards you, then take the upper third side of the paper and fold it down towards your direction. You can use the above picture as a guide. You can align the envelope under the center of the paper to get the perfect dimension.
Step 6: Fold it up from the bottom

Take the bottom third of the paper and fold it upwards and away from you. After folding it up from the bottom, the receiver’s address will be visible.
RECOMMENDED POST: How to Send a Letter Internationally| Simple Step-by-Step Guide
Step 7: Place the folded letter into the envelope

This is the last step of the process, where you take the letter and place it in the envelope with the recipient’s details facing the front. After doing that, put the letter in the envelope to enable the information to show through the window.
Can I Fold A Letter Into Its Envelope?
Here are two ways you can fold a letter into its envelope.
1. How To Fold A Standard Sized Envelope
This folding type is commonly done with A4 paper, the standard printer paper globally. Unlike other papers, an A4 is slightly longer and narrow, so we need to cut off some of the parts to get a standard 8.5″ x 11″ to get a classic fold.
Here’s a step-by-step outline of how to fold a standard-sized envelope with pictures.
Step 1: Cut to Size
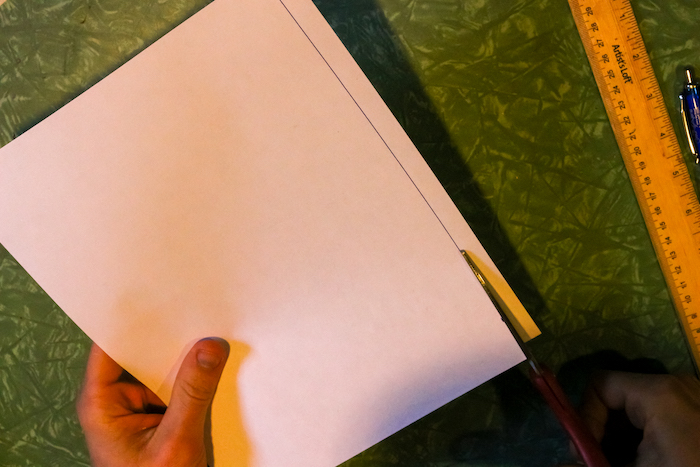
Take off half-inch of paper from the long side of your letter.
READ ALSO: How to Write a Statement Letter in 2022 | Easy Step by Step Guide
Step 2: Fold into two
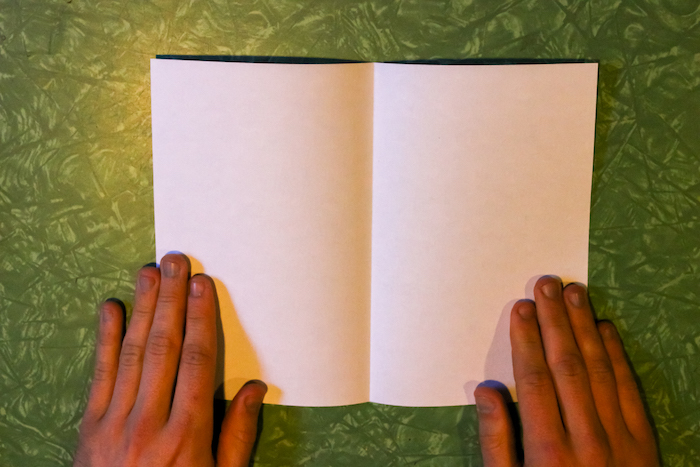
Here you are expected to fold the envelope into town and then unfold it. The reason for this is to create a center crease.
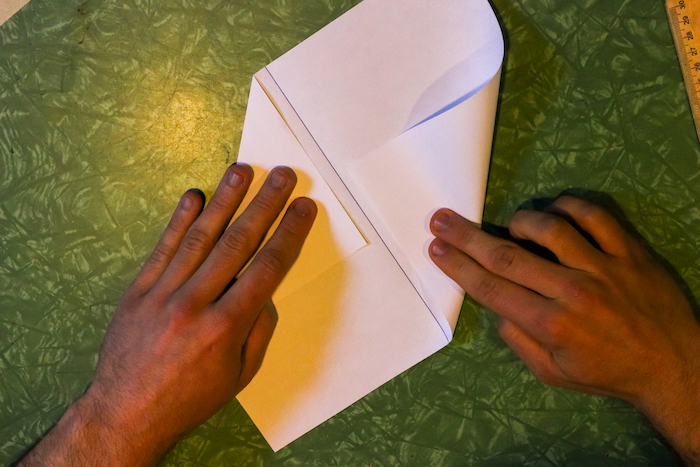
Step 3: Fold Down Corners
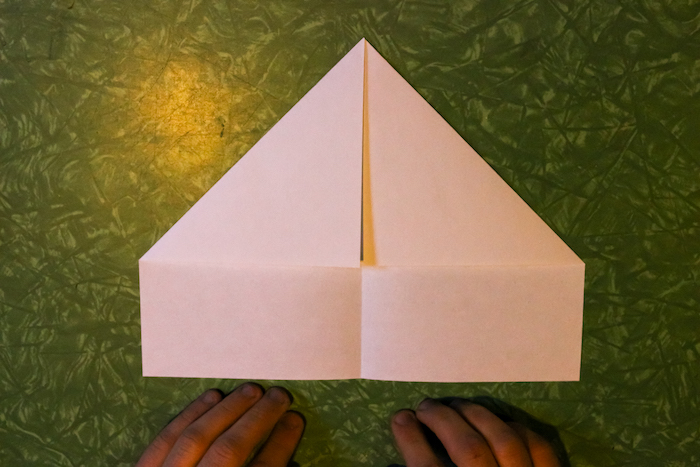
The next step is to fold the top right corner to the center crease and then repeat with the top left corner.
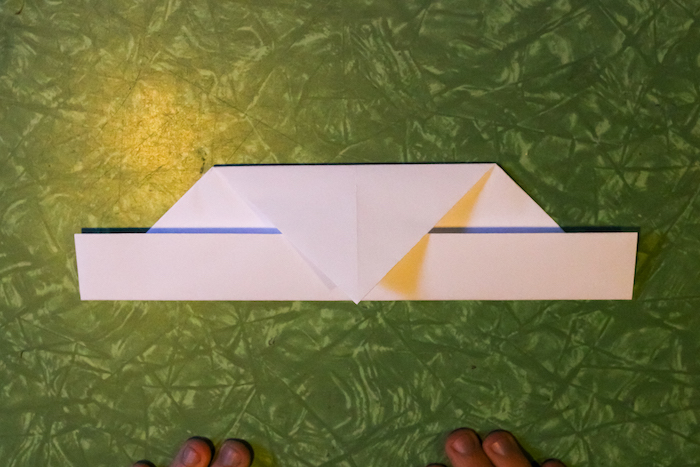
Step 4: Fold Bottom Up

Fold the bottom of your letter up to form a well-shaped triangle you just made.
Step 5: Fold Bottom Up Again
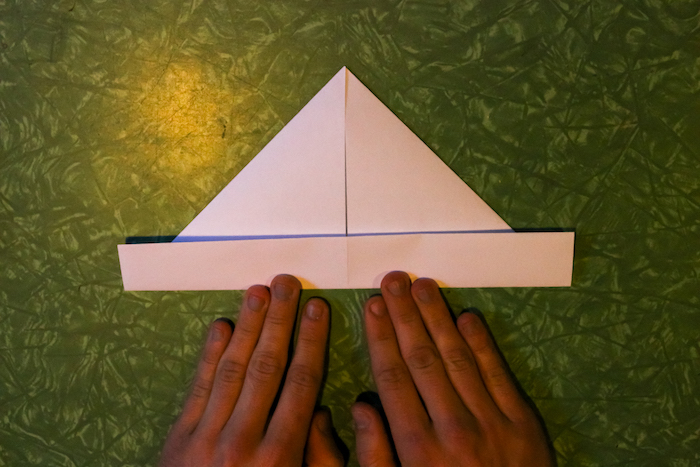
When that is done, fold it a second time along the line that demarcates your bottom rectangle from the top triangle.
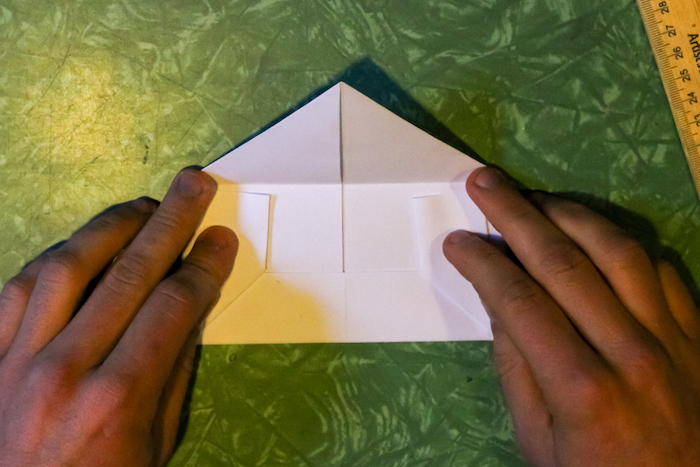
Step 6: Fold the Top Down
As seen in the photo, fold the tip of your triangle to meet the bottom edge.
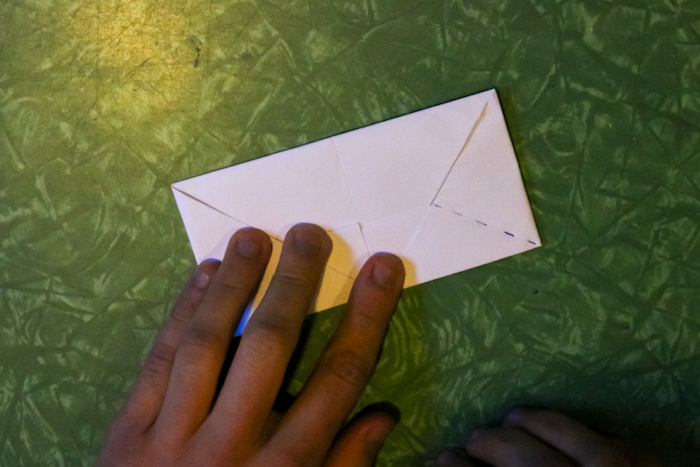
Step 7: Fold the Sides
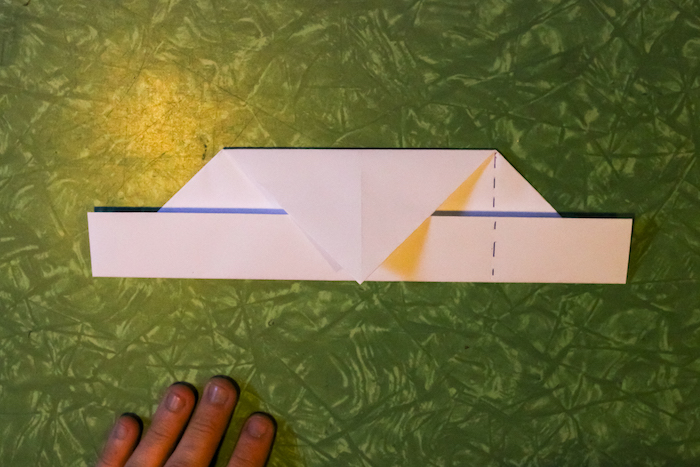
To make a square edge on your envelope, fold the sides in. I’ve added a dotted line to indicate where to fold on the right. You can also add the dotted lines to make it straight.
Repeat on the other side.
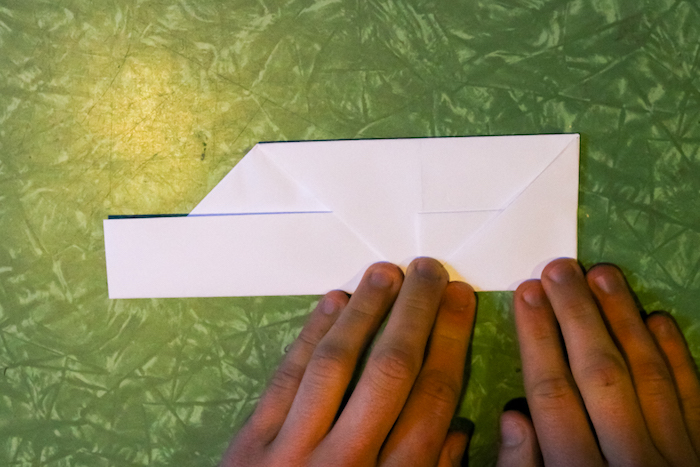
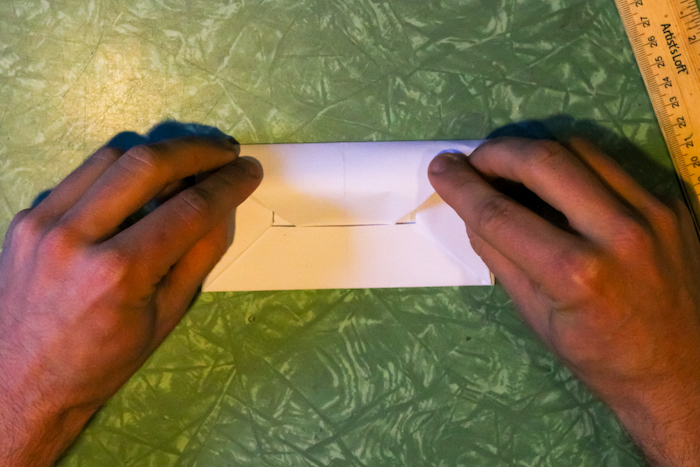
Step 8: Fold Tabs Up
The next step is to take the tab you folded over in Step 6 and fold it up so that the crease line is roughly perpendicular to the line of your triangle piece.
READ ALSO: 15 Awesome “To Whom It May Concern” Alternatives | Letter Writing Tips
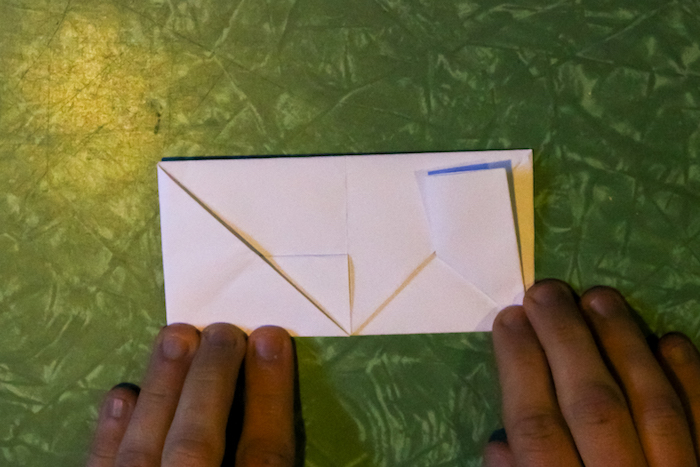
Please ensure it is slightly less than square to the short side of your letter envelope.
Do it again on the other side.
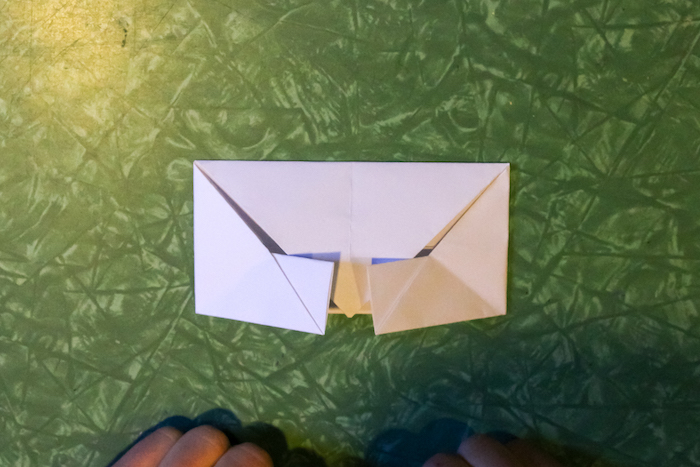
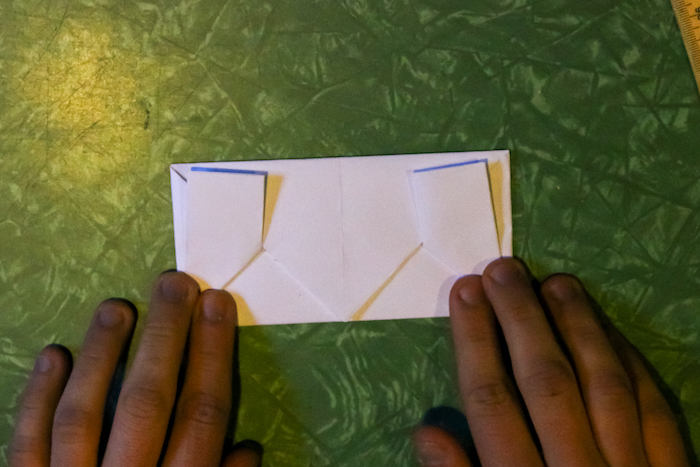
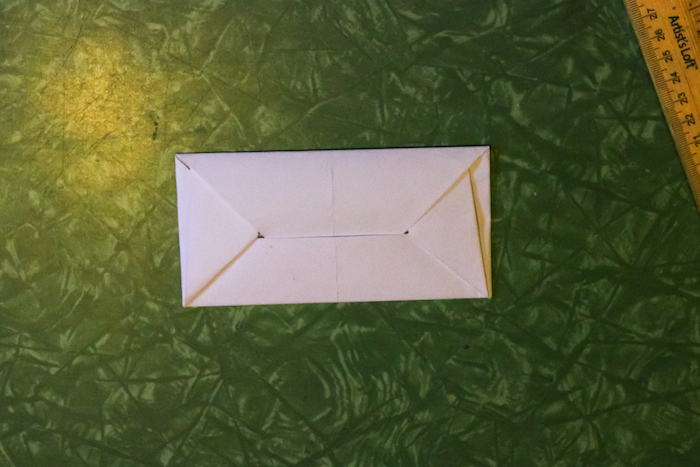
Step 9: Complete the folding
Fold your triangular flap back down over your tabs and beneath the flap at the bottom of your envelope. And boom! You’re done.
How To Fold A Letter Into An Envelope with Beveled Corners
This style is best suited for standard 8.5″ x 11″ printer paper. No trimming is necessary.
Step 1: Fold into two equal parts
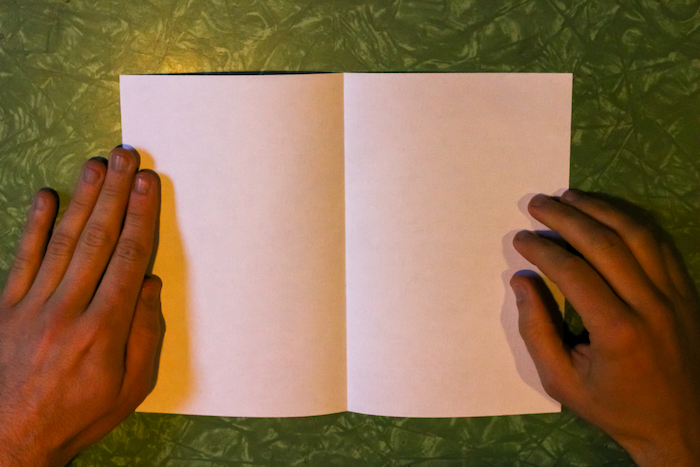
Fold the letter into two equal parts and then unfold.
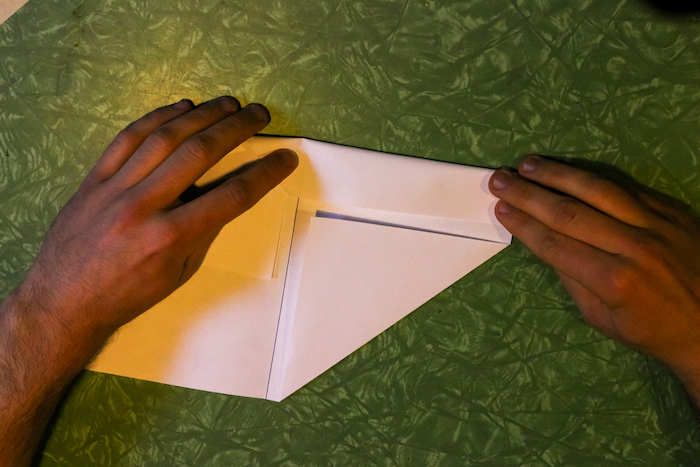
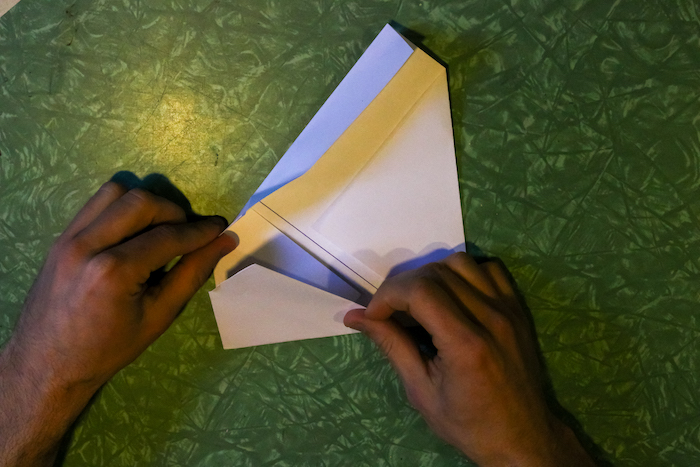
Step 2: Rotate and Fold Corners

Next is to rotate and fold the lines. You can draw a line in the middle to help you do it better.
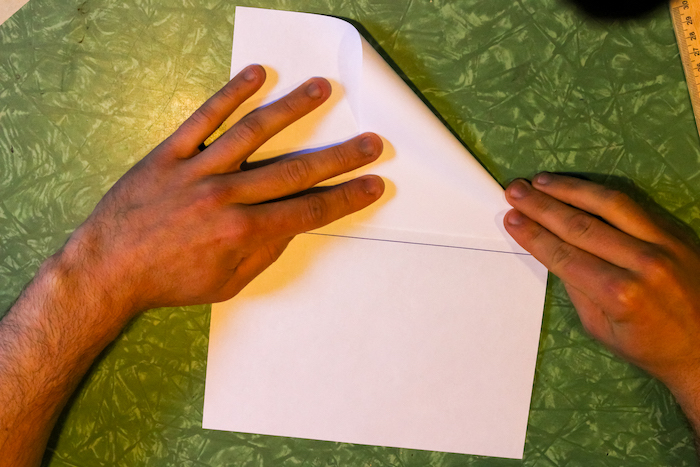
Turn the letter 90 degrees so that the short side is facing you. Fold the top right corner almost to the center of the paper, where your seam will be. The idea is for this fold to stop approximately a half-inch away from the central crease.
Do the same with the opposite corner.
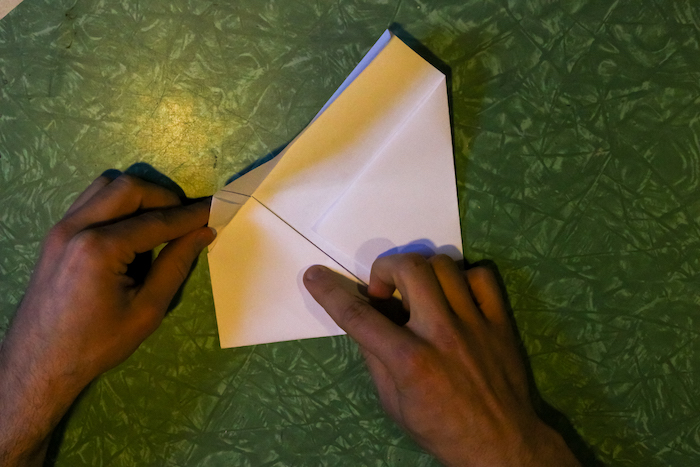
Step 3: Now Fold Sides
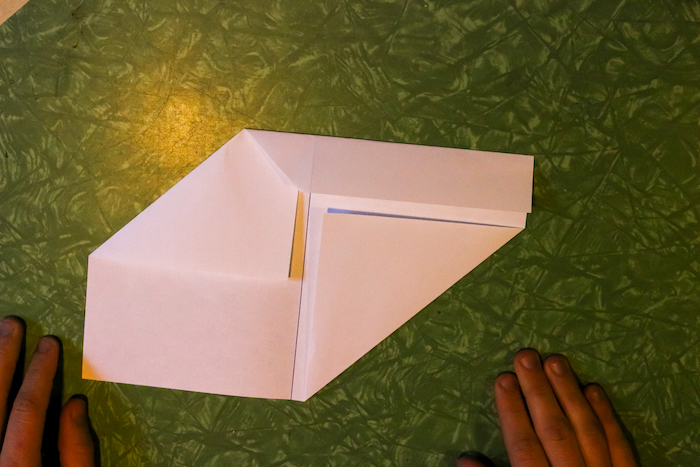
Rotate the long side so that it is at the top once more. Fold the top down toward the center, leaving a half-inch gap between the folded corner’s edge and the folded side.
RELATED POST: How to Write an Apology Letter to Your Company | 2023
Do the same with the bottom edge.
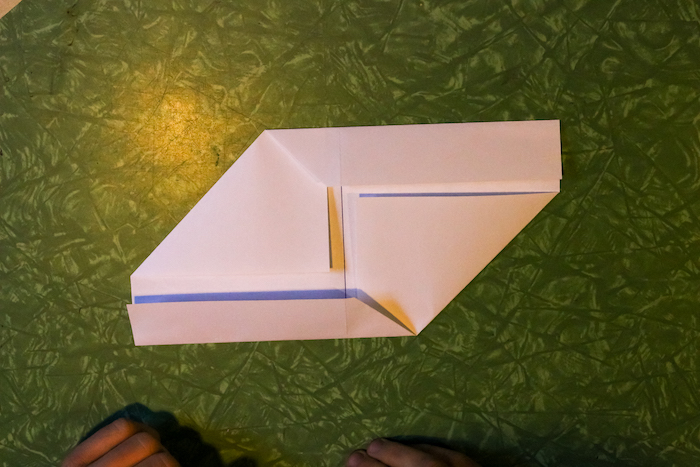
Step 4: Fold Corners In
You should now have two square corners facing each other. Fold one square corner to the opposite side of the letter so the edge matches the central crease of your paper.
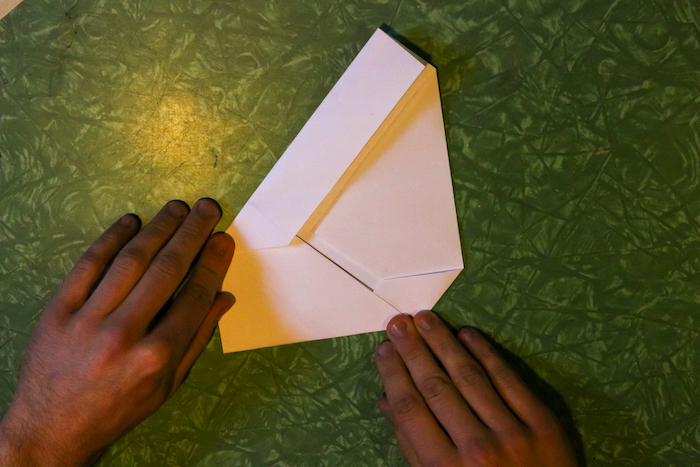
As you fold, raise the long flap and tuck the corner under.
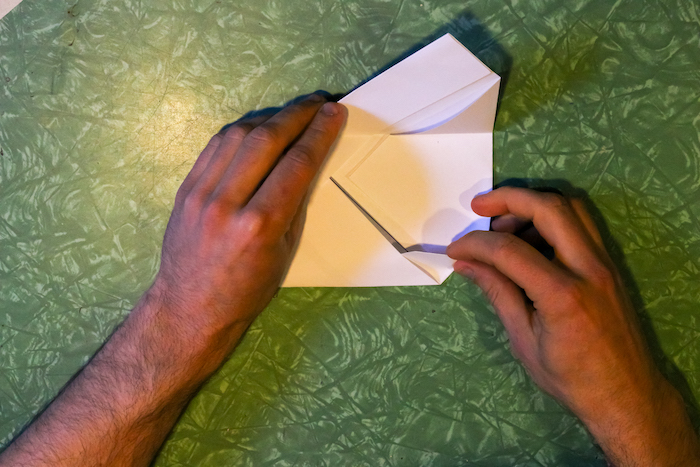
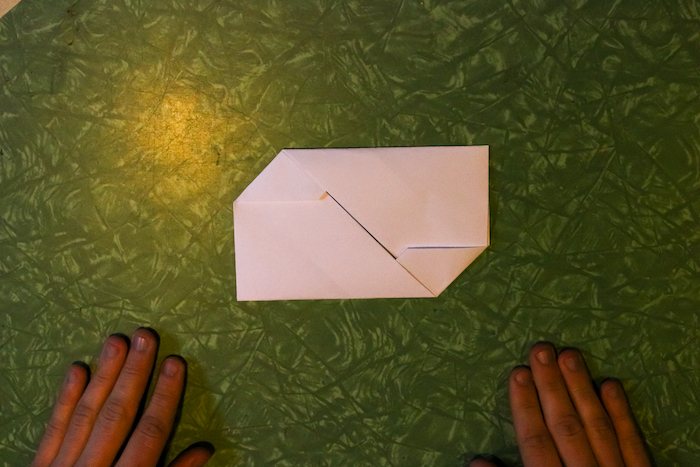
Do the same with the other square corner. You should have two tucked-in corners, and you’re done!
FAQs On How To Fold A Letter Into An Envelope
If you want to fold the letter correctly, firstly, you have to take the bottom 1/3 of the letter and fold it upwards towards the letterhead – it should be folded about halfway to the top. Then crease the fold.
The best way to place a card into an envelope is with the face of the card facing the back of the envelope.
You can choose to use an envelope with the dimensions 11-1/2″ long x 6-1/8″ high. (A standard No. 10 envelope is 9-1/2″ long x 4-1/8″ high.)
Begin by flipping the clasp envelope so that the clasp is facing down and the flap is on the right side. Then, in the upper top-left corner, write the sender’s address in a pretty small size so there is plenty of space in the center of the envelope.
Conclusion
You may think folding a letter into an envelope is old school, but that’s not true. When you master how to fold a letter into an envelope using any of the methods listed above, you will find the act fulfilling and also classy.
References
- artofmanliness.com – 2 Ways to Fold a Letter Into Its Own Envelope
- wikihow.com – How to Fold and Insert a Letter Into an Envelope
We Also Recommend
- How to Write an Apology Letter to Your Company | 2023
- How to Ask for a Letter of Recommendation for Grad School | Guide
- How to Write A Stay At Home Mum Cover Letter | Sample Templates
- 10 Best Samples of a Resume Header | Learn how to Write
- How to Find & Reach out to a Hiring Manager for an Opportunity


